
Rise Garden Review: The Best Way To Grow Indoors in 2024

This post follows our research editorial guidelines.
I’ve been on the hunt for the best indoor hydroponic kit on the market and think I’ve found a winner. One of my biggest frustrations with gardening is pests! I spend hours tilling the earth, planting the seeds, watering and nurturing the plants as they grow, and waiting for the day when it’s time to harvest.
Unfortunately, more often than not a cucumber beetle or pepper fly spots my bustling garden of ripe fruit and veggies and has new plans of when they are ready to be eaten. It’s one of the reasons why I’ve turned to indoor hydroponic growing. I can have complete control over my produce and keep them away from any nearby pests looking for a late-night snack.
Attention Garden Lovers: This post contains handpicked links to recommended gardening products. If you buy something through these links, I may earn a small commission at no extra cost to you.
You might be familiar with the AeroGarden hydroponic kit but let me introduce you to what I see as the upgrade to your average hydroponic kit, the Rise Garden. Let’s take a look at why the Rise Garden is in my opinion one of the the best hydroponic kits on the market.
Quality 10/10
Ease of Use 9/10
Support 9/10
Price 8/10
Rise Garden Family
9/10
The Rise Garden is your all-in-one at-home indoor garden. It’s the perfect combination of craftsmanship and ultimate functionality allowing you to grow what you want, any time of the year.
Key Features :Table of Contents
What is the Rise Garden?
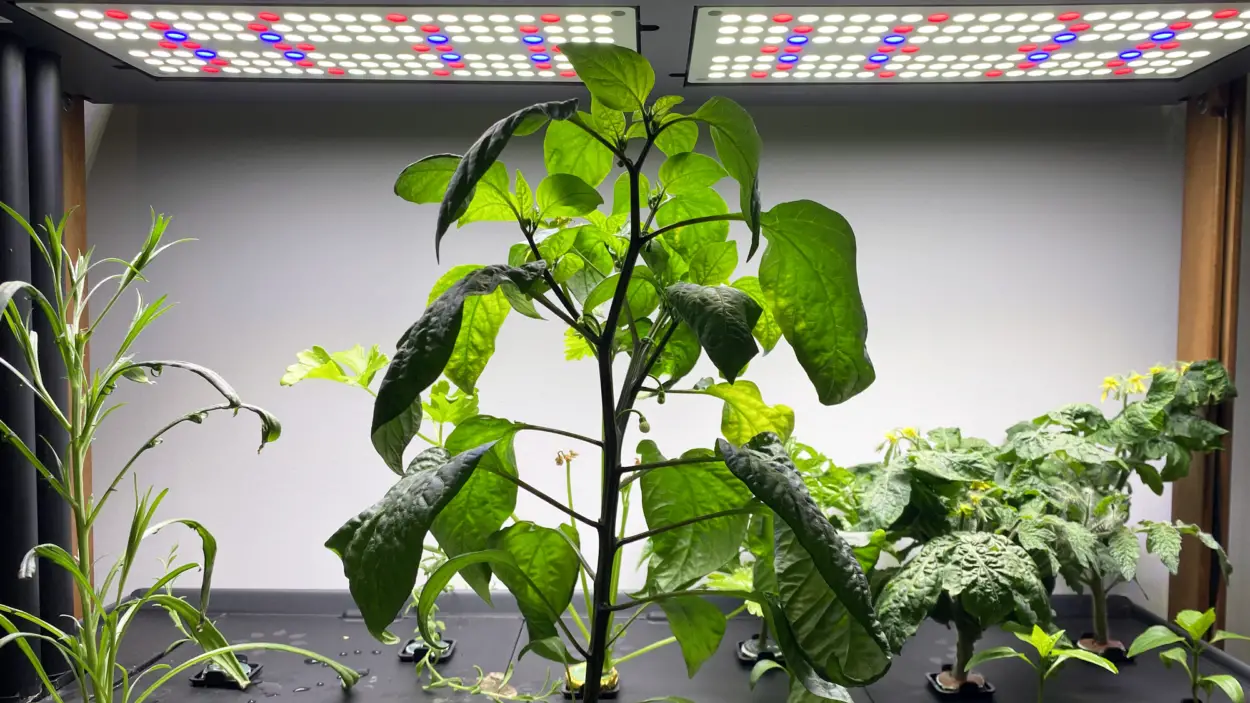
The Rise Garden is a single or multi-level indoor hydroponic growing system. This personal indoor garden uses a large water reservoir and pump to flow nutrient-rich water along a tray system containing potted plants. This system is called Ebb and Flow hydroponics. LED lights sit above the plants providing the light they need to grow. The Rise Garden is a low-maintenance way of growing fruit and vegetables indoors that is free from pests and natural elements.
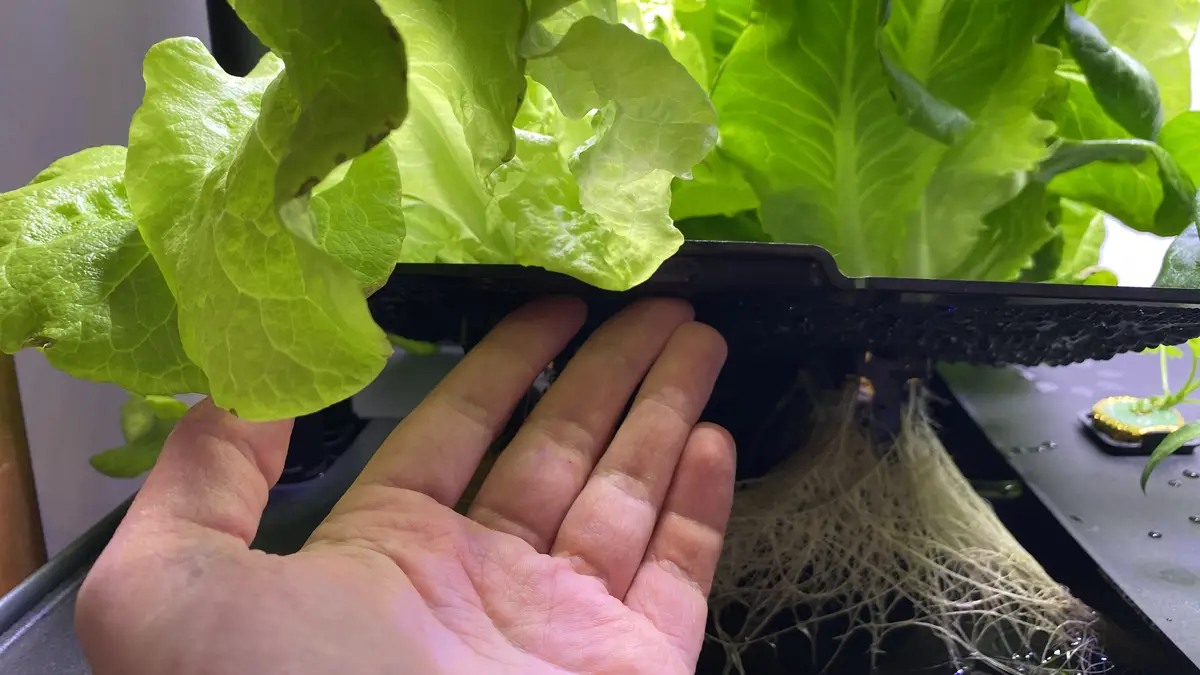
What I like about the Rise Garden as opposed to other hydroponic kits is that the roots are in contact with flowing water continuously being circulated through the system which adds oxygen to the water. Most other kits use deep water culture as their form of hydroponic growing which reduces the oxygen that comes in contact with the root system. With less oxygen plants grow slower and are more susceptible to disease.
What comes included in your Rise Garden kit
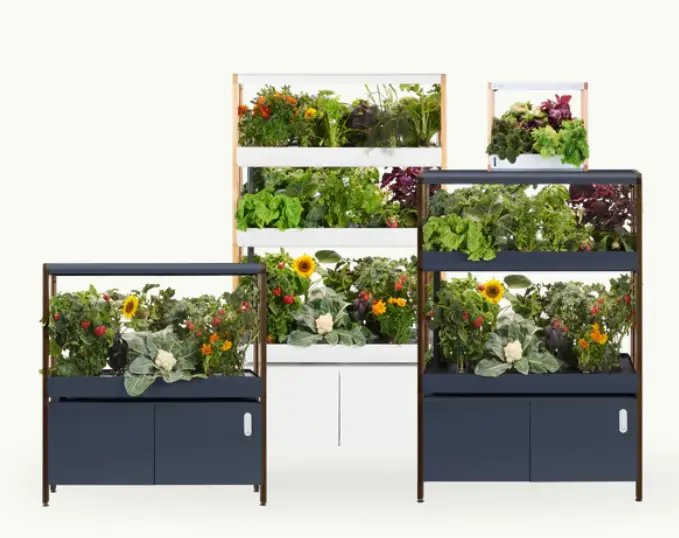
What’s included in your rise garden will depend on the model you purchase. The older personal rise garden is a tabletop version that will hold up to 12 plants. I recommend going with the new single family, double family, or triple family garden as these versions will be able to hold the most plants at any given time. I ended up getting the double family garden which is able to hold up to 24 plants or 36 plants once I get the third level installed.
Here is a breakdown of what’s included with your Rise Garden:
(1)- Starter Seed Pack:
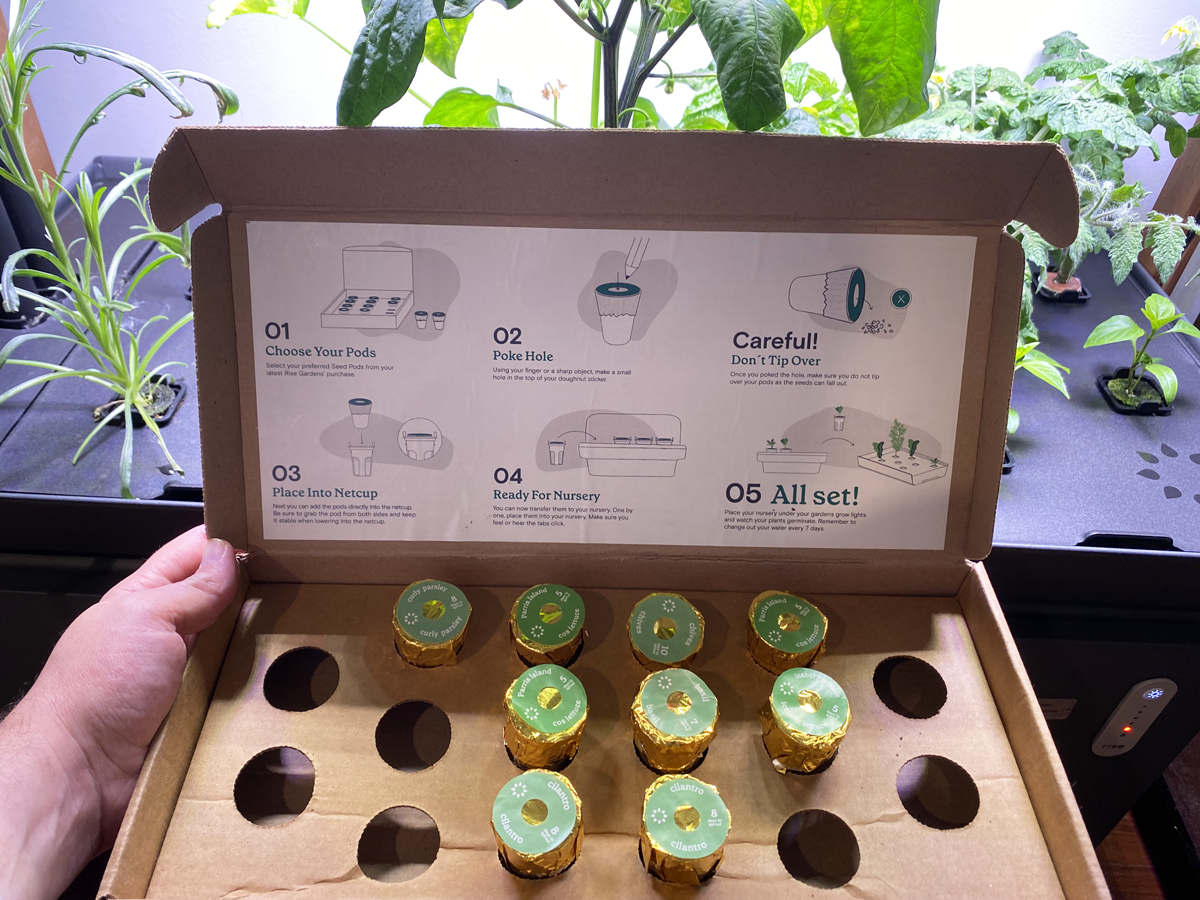
If you’re looking at getting the original tabletop personal garden you can expect to get an 8-pod starter seed pack. With any of the new stackable family gardens, you will receive a 16-pod starter kit. My starter pack included a variety of herbs to grow like basil, parsley, and cilantro along with a bunch of lettuce varieties to try including Iceberg, Cos Lettuce, and Perry Island. I would expect to receive more herbs than lettuce with the 8-pack of starter seeds given the smaller grow space.
(3) – x 4-Pod Trays per level:
Again, this will depend on how many levels you purchase. I have 2 levels with my kit so in total I received 6 trays. This gives me enough space to grow 24 plants at all times. Each section that holds a seed pod is spaced far enough from the surrounding nets to prevent overcrowding. Since I have some bigger plants in my trays (no pun intended) I regularly prune the leaves to allow proper airflow to circulate through.
(18) – Net Cups per level
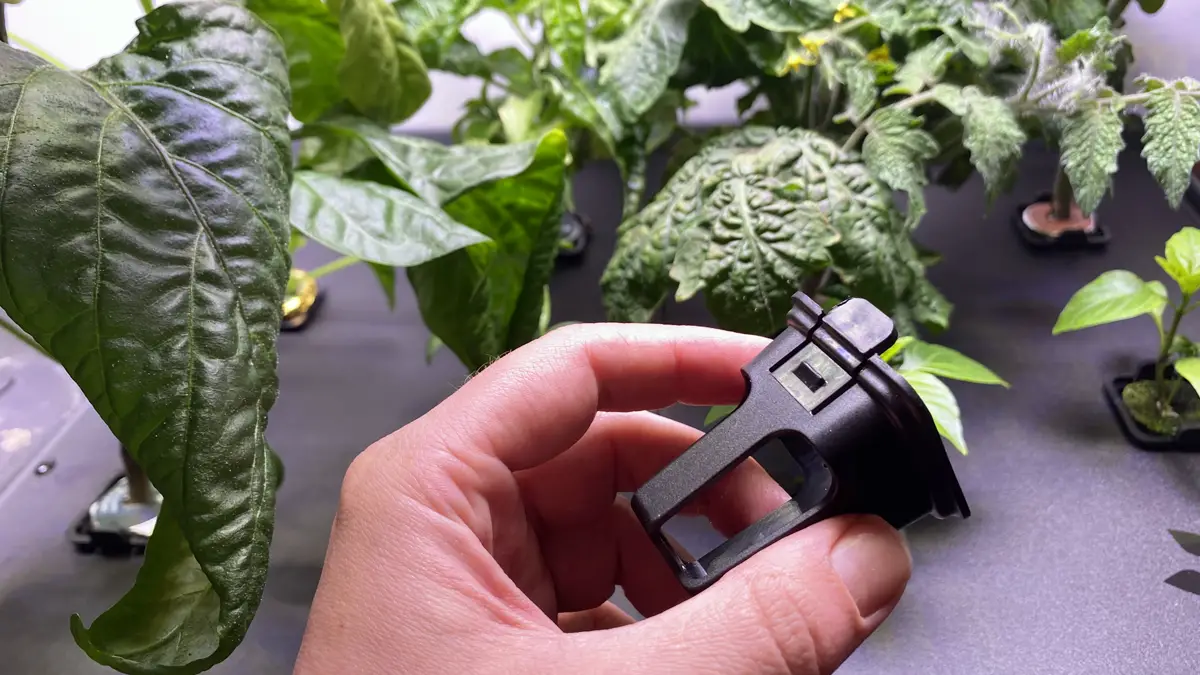
What I like here is that they include a few extra net cups per level. While the nets are fairly sturdy compared to other hydroponic garden nets like the AeroGarden, accidents do happen. They throw in a few extra net cups in case you lose some or damage them during a harvest.
(1) Nursery per level
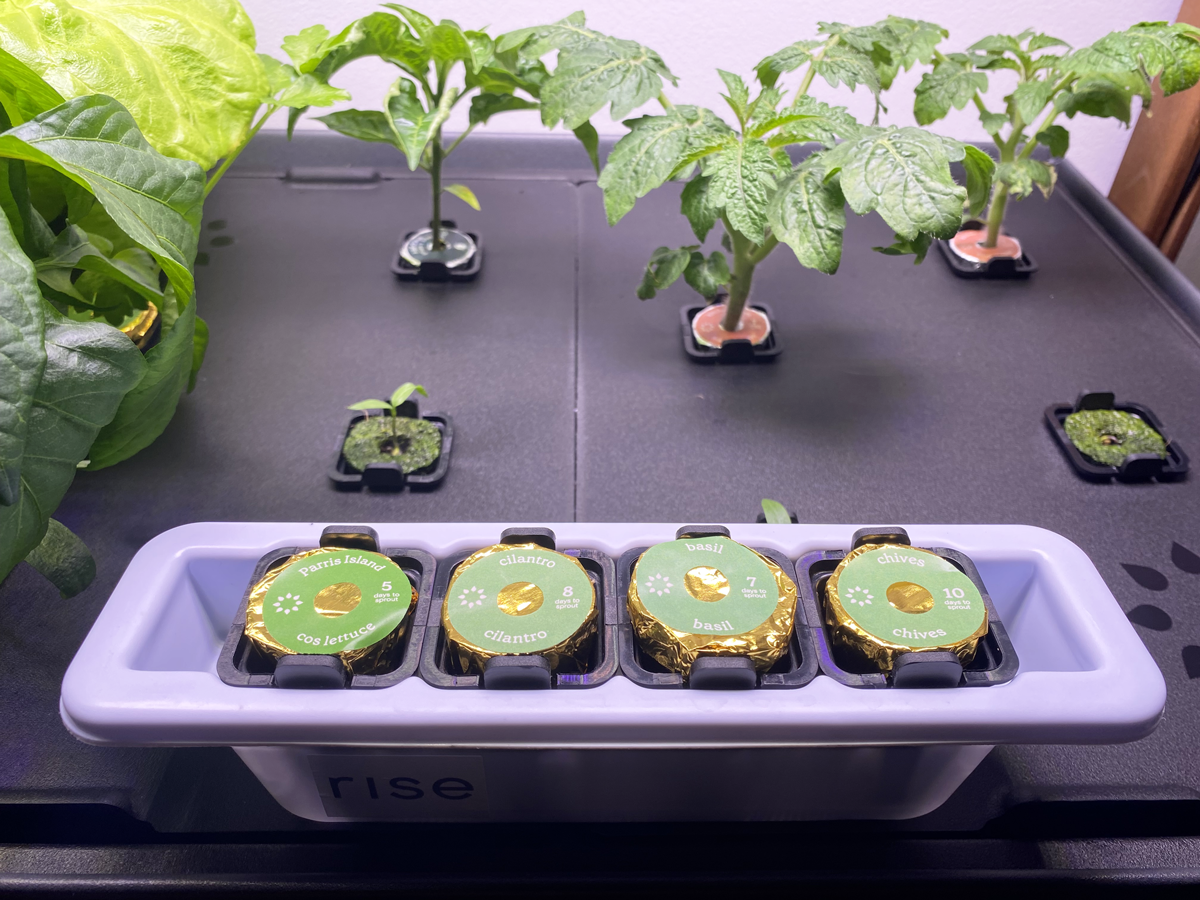
What’s different about the Rise Garden’s way of growing is the care and attention given during the germination phase. I’m used to popping the seed pods into running water and slapping a grow dome while I wait for the seeds to sprout.
The Nursery that’s included with your kit gets filled with water and is contained until germination or the first set of “true leaves” appear. All you have to do is change the water every 7 days which the mobile app will remind you of.
I liked this way of starting seeds since it isolates the new germinating plants which can be sensitive to fertilizer and contaminants during those first few weeks. It’s clear that the team over at Rise isn’t new to the gardening space. The only complaint I have here is that it would have been nice to receive more than one nursery per level. Each nursery only holds 4 seed pods which set back the garden from being full of plants by a few weeks.
(1) Plant Food Kit with PH Balance, Thrive, & Sprout
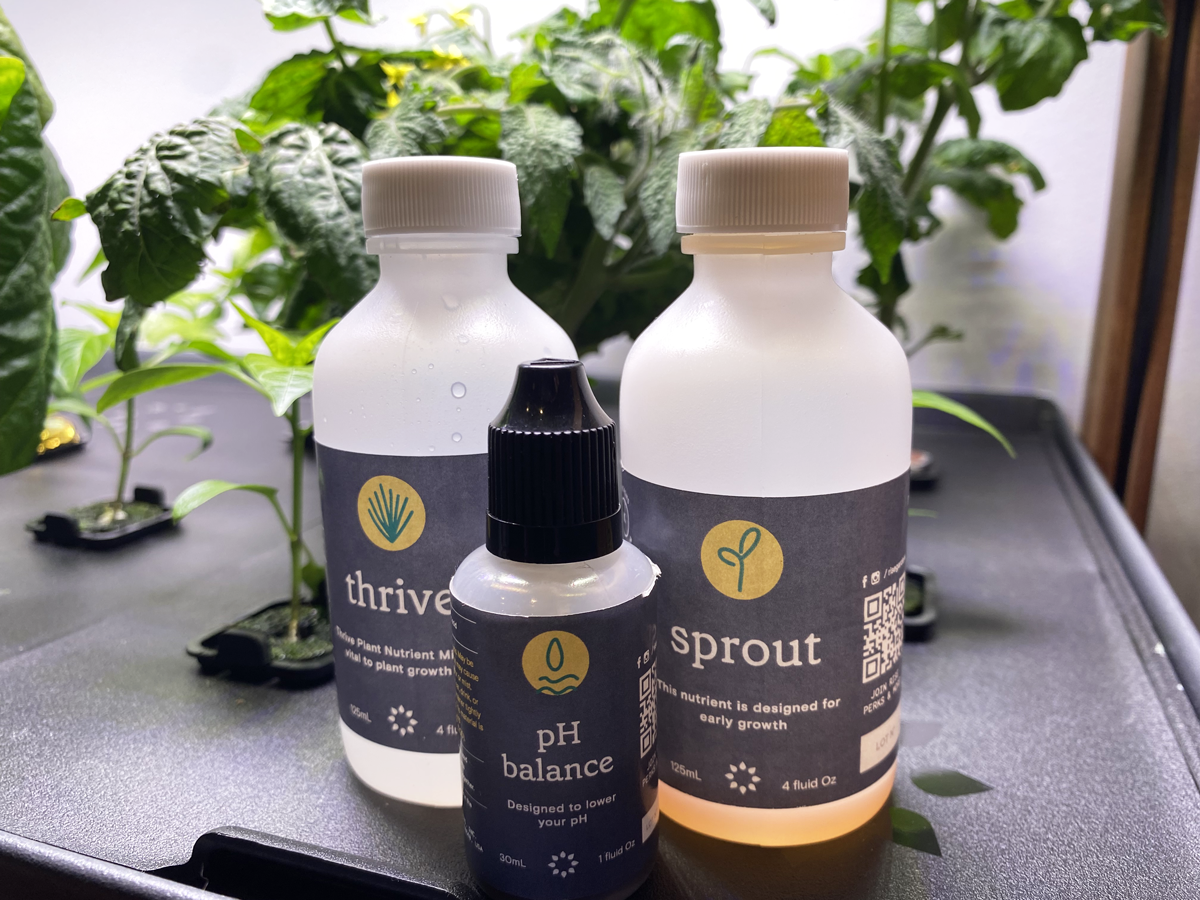
The plant food kit comes with 1 bottle of Sprout, and 1 bottle of Thrive. The “Sprout” plant food formula is high in nitrogen which is needed for green growth and potassium for root establishment. The second bottle called “Thrive” is heavy in macronutrients like magnesium, contains little to no nitrogen, and is high in potassium and prosperous which helps the plants produce flowers, fruit, and other key functions. Last but not least, your kit will include a PH buffer solution.
The pH buffer is used to balance the pH of your water when it becomes too alkaline. Over time as you keep adding nutrients to your water the pH will begin to creep past the optimal range of 5.8-6.0. This can spell trouble for your plants as they are unable to uptake the nutrients needed to thrive and grow. Some plants are more forgiving than others to pH fluctuations while plants like blueberries actually require a low pH in order to fruit and thrive.
For you nutrient nurds out there like me here is a breakdown of what’s included in each bottle:
Sprout Nutrients:
- 5% nitrogen (N)
- 4% Potassium (K)
- 4% Calcium (Ca)
- 1% Iron (Fe)
Thrive Nutrients:
- 2% Phosphorous (P)
- 2% Potassium (K)
- 2% Magnesium (Mg)
- 1% Custom blend (Secret sauce😉)
What Can You Grow In A Rise Garden?
I’m glad you asked! I’ve been having a lot of fun pushing my Rise Garden to the limits of what it can grow. I didn’t want to just grow a bunch of herbs and lettuce as I do in my AeroGarden but instead wanted to make good use of the extra space I now have. Now I can grow some of my favorite summertime veggies without the fear of pestering bugs or temperature changes as fall sets in. Let’s take a look at what I’m growing to give you an idea of what’s possible.
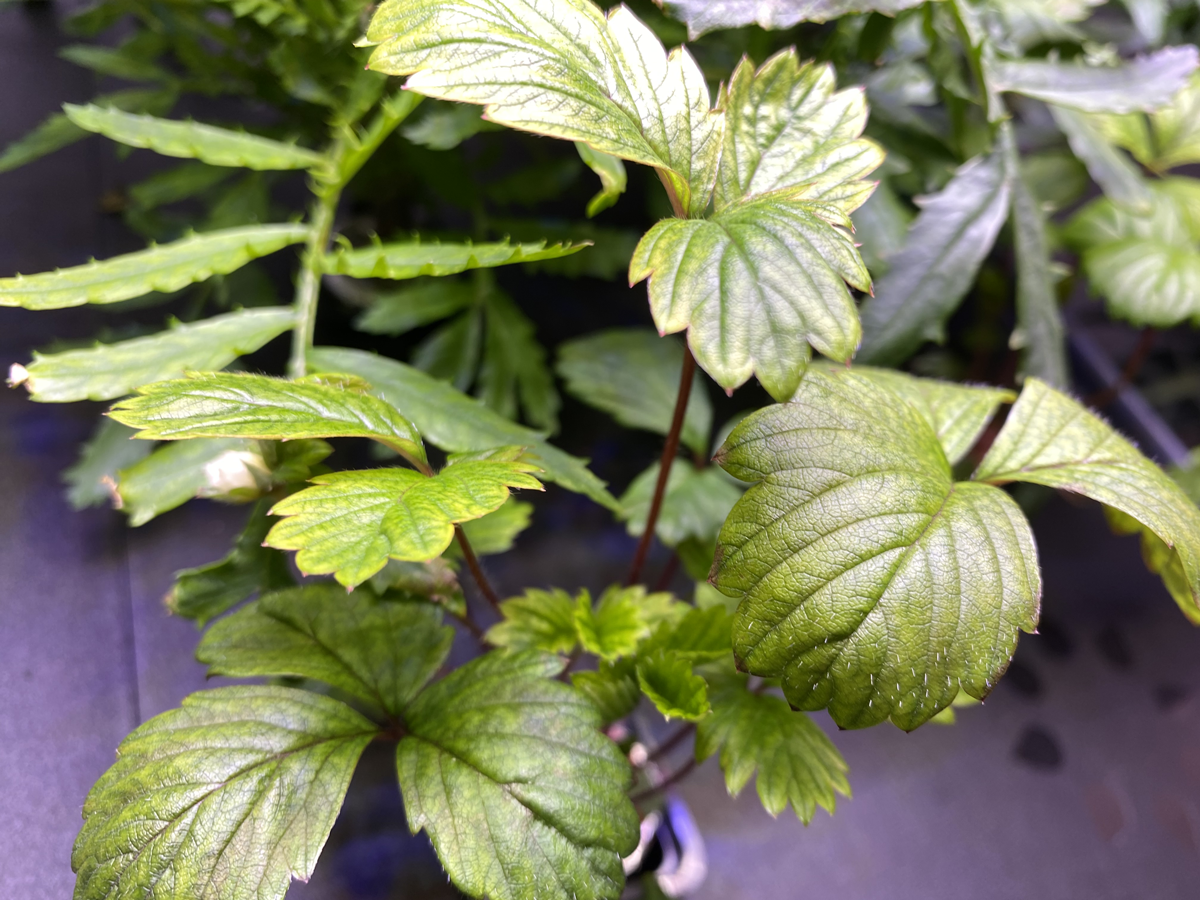
Here’s what I’m growing:
- Sweet peppers and hot peppers
- Tomatoes
- Strawberries
- Cauliflowers
- Flowers of many types
- Kale
- Celery
- And of course lettuce and hers
A few plants on my list to try in the future:
- Root vegetables like carrots, beets and turnips
- Cucumbers
- Beans
- Microgreens
How To set up the Rise Garden
The set-up in total took around 45 minutes from start to finish.
Step 1: Delivery / Pickup – Planning where it will Go
While I normally wouldn’t cover such a minor part of the setup process I thought it was important to note that the Rise Garden is not your average hydroponic kit. The Frame of the unit is a combination of high-quality metal and wood with very little use of plastic parts. This creates a showstopper of a vertical garden but can be a bit heavy to move on your own.
I made the mistake of setting up my Rise Garden right next to my desk before coming to the realization that the bright lights and water-flowing sounds might be a bit too distracting long-term. This made for a difficult move since I already filled up the water tank -Woops!
The unit can be quite heavy even before it’s filled with water so consider asking for help when moving the box to the desired location. I used a dolly to bring the box into my house since I’m horrible at asking for help.
When you first set up your Rise Garden, it can be a bit noisy. Especially if you’re not used to hearing the constant flow of water. If the sound of flowing water doesn’t invite thoughts of tranquility to you I recommend you place the garden away from where you spend a lot of time sitting or sleeping. For me, I set it up in my office about 10 feet away from my desk. Once the plants started to develop roots this acted as a sound dampener to the flowing water which became whisper quiet.
You really get a sense of the quality craftmanship that went into building each and every Rise Garden kit, from the solid metal sections to the smell of the freshly stained wood that comes out of the box. My wife was surprised at how elegant it looked once fully put together. We even considered making it a centerpiece in our kitchen but that was quickly re-considered once we thought our curious little kids might get too involved in playing with it.
Step 2: Setting up the Base and Frame
At first, the setup was a bit intimidating. Lots of big parts and boxes to open had me thinking I’d be setting this up all day. Luckily my first impression didn’t last. The manual that comes included is very detailed and shows pictures for each step. Starting with the metal base you will need to attach each of the 4 legs to complete the first level of the frame.
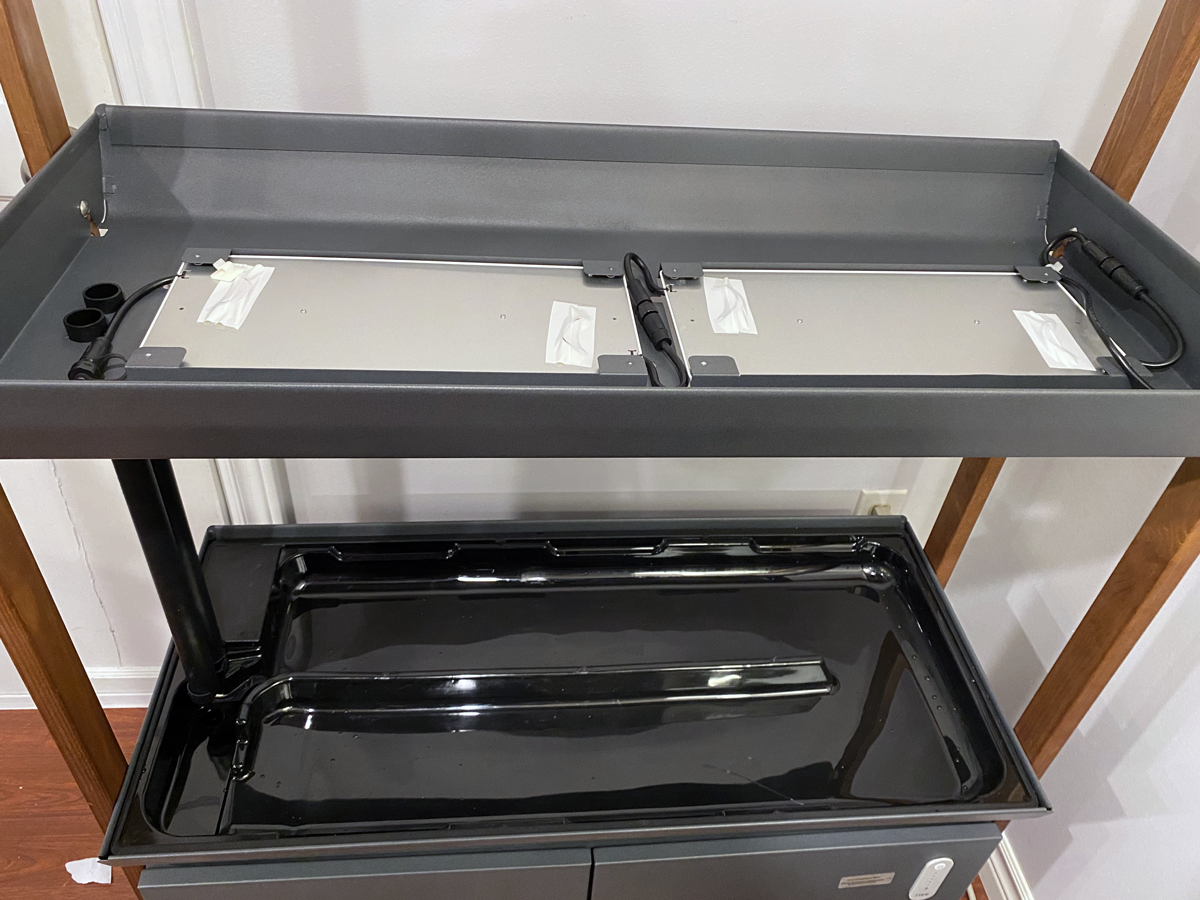
Step 3: Water trays and LED grow lights
Once the base is put together you will begin to set up the water conduit which holds the water trays along with the LED lights. The first water conduit rests against the base and will hold the lower tray. Each tray is made from durable black plastic which is an HDPE form of plastic and has a recycling rating of #2. This type of plastic is ideal for holding liquids since the leaching potential of harmful chemicals like BPA is low-non-existent.
I appreciate seeing that this was not a cheaply made plastic section that’s often used by some of the competitors – I’m looking at you AeroGarden, and there was some thought behind which materials would be best to use. Other hydroponic kits I’ve reviewed skipped this crucial consideration and use hard plastics that are known to contain harmful chemicals like BPA which is not something I want my organic produce sitting in while it grows -sort of defeats the purpose don’t you think?
If you purchase the second or third level unit the next and final water conduit will also contain the LED grow lights on the opposite side of the water tray This made set-up a breeze since I wasn’t fiddling with a bunch of separate parts. The top section of each unit will contain a set of LEDs encased in metal for a sturdy build.
As each light is installed, you will have to run the cable that is attached to the light down the grooves that are notched out of the wood rails. This keeps the electrical tucked away for a tidy and clean look. No strings of random cords!
Step 4: Installing the water pump and pipes.
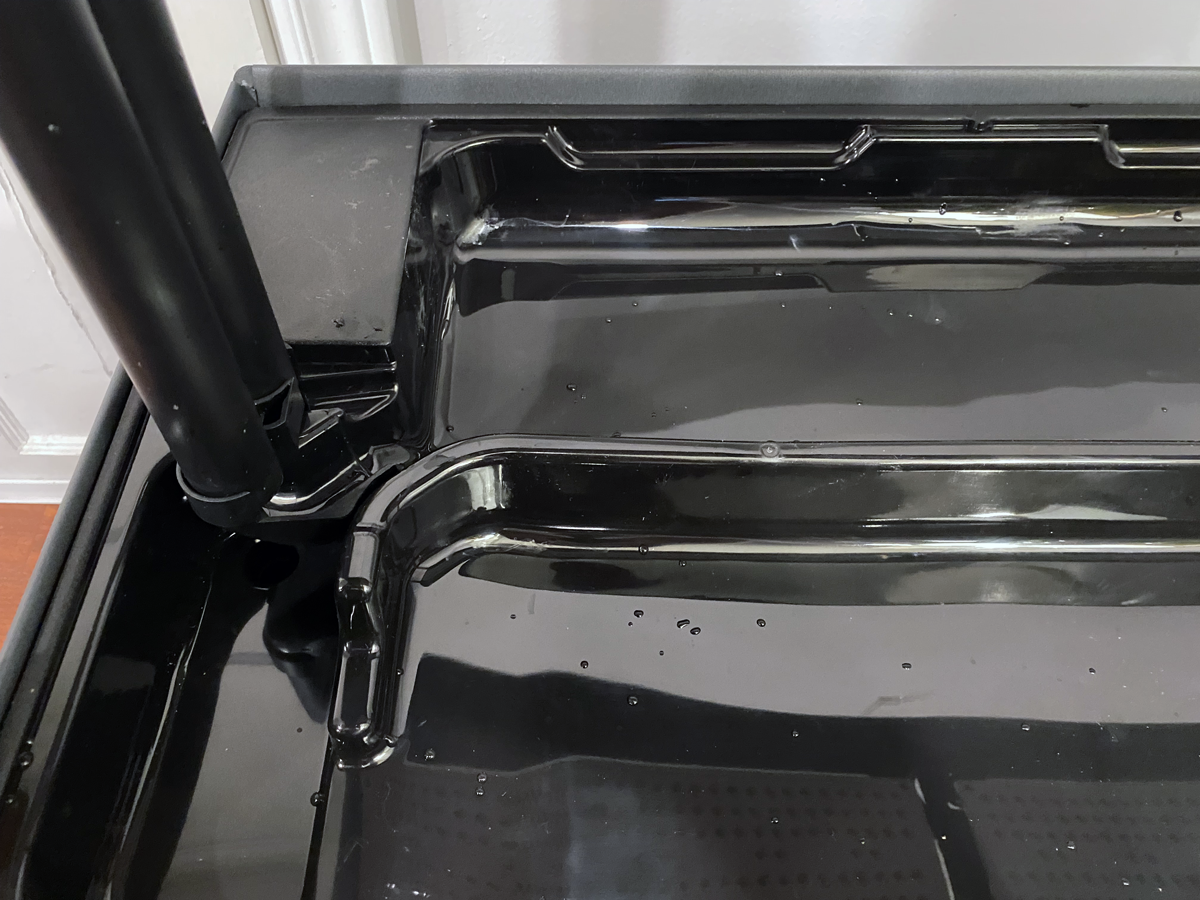
Once the water trays are in place it’s time to connect the plumbing. Water is pumped up from the tank to the top of the tray before making its way down to the lower levels. The back half of each tray is on the receiving end of the water flow from the plumbing while the front half of the tray guides the water along down to each lower level. The plumbing pipes rest easily in place once the adapters are attached to the trays. Simply slide in the pipes for a snug connection.
At the base of the unit, 2 doors open up to the cabinet which will hold your water tank on the left and house the control box on the right. In between the tank and the control box, there is also a bit of space for you to store your seed pods, liquid nutrients ad any water-testing gear you may have.
Start connecting the water pump to the tubing by uncoiling the tubing and positioning the water outflow at the top of your highest water tray. Once the tubing is clicked into place, position the pump in the water tank away from the tank walls using the suction cups that are attached to the bottom of pump. For some reason, I wasn’t able to get the suction cups to stay attached for any meaningful length of time but this hasn’t impacted the water flow for me so I haven’t felt the need to get this properly in place. As long as the pump is fully submerged in water everything will work as expected.
Step 5: Attaching the tray lids and service doors
Now that the Rise Garden is connected to the plumbing you can put together the finishing touches. This includes adding the tray lids which will hold the net pots in place and the service doors for you to be able to easily add nutrients and pH solutions without disrupting your plants. Each hole for the net pots comes with a small 2×2 inch cap to keep the water from splashing out or contaminants from coming in while those spots are empty. This is handy especially in the beginning since you may only have 4-8 plants in the system while the others are germinating in their nurseries.
Step 6: Connect the electronics
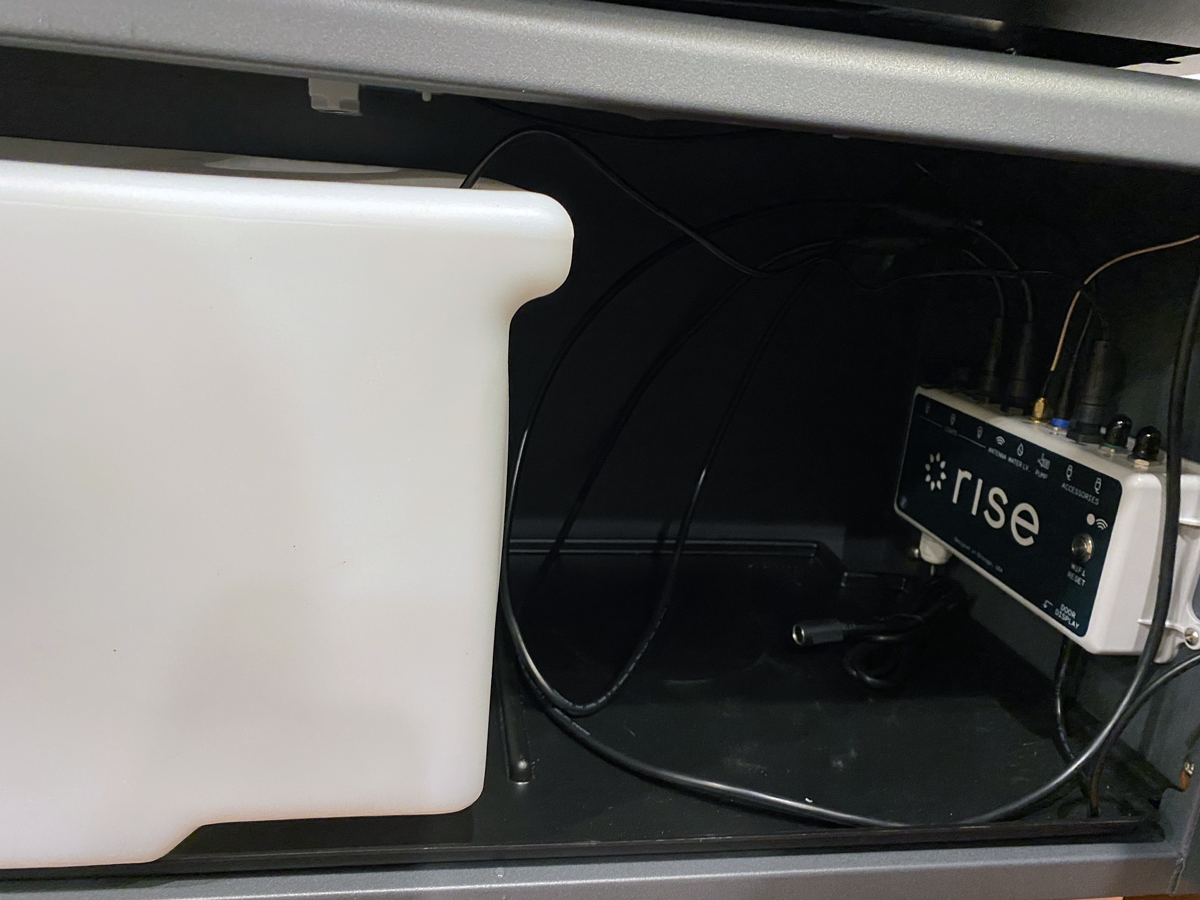
The Rise Garden comes equipt with a sophisticated control box that’s far superior to any other hydroponic kit I’ve had the chance to review. Whoever worked on developing this part of the system sure had a love for automation. All of the lights, pump, and accessories are controlled here. The panel has a wifi connection through a small antenna and Bluetooth pairing to send information over to your Rise Garden App where these settings can be controlled. I appreciate that the control panel is separate from the device itself, if anything were to happen to the electronics of your device I’m sure that having an easy-to-replace control panel would mean the difference between SOL and Back in Business.
Step 7: Fill Up and Power on!
And just like that, your Rise Garden is set up and ready to go. The final stage is now to add water and connect it to the power supply. The water tank has a clear indication when the water level is too low or if it’s too full. I was surprised by the amount of water the tank holds. This adds to the low-maintenance growing that I love with hydroponics. There’s nothing worse than going away for a weekend and coming back to a bunch of dead plants that have dried out under your LED’s.
My kit is fully stocked with fresh greens, vegetables, and flowers and it took around 40 days before I even had to think about adding more water. I have my lights set to full strength so you could extend this even further if you dialed back your light settings to 50%.
Once the tank is full, it’s time to plug it in and turn it on! The power supply has an on-and-off switch for you to toggle once plugged in. This will turn on the lights and start the pump. If the pump does not start, press and hold the button next to the water indicator light for 5 seconds which is located on the front of the cabinet. You should now see a solid red light that’s letting you know the control panel is ready to be connected to the Rise Garden app.
ATTN Do not plug the power supply into the wall yet! Powing on a dry garden may damage the pump.
Growing with the rise Garden App
At first, I didn’t have many plans of using the free Rise Garden app. Not that have anything against combining technology with gardening but I’ve been doing this for a long time now and I didn’t feel the need to track my progress. That’s where I went wrong…
The mobile app tracks more than the start date of your planting cycle. It guides you along the entire grow from seed to harvest giving unique recommendations per plant. Planting a tall plant in a small area, not to worry the app will let you know before you do. The app also tells you when more nutrients are needed, how much water should be added with those nutrients based on your current water levels, and much more. Here are all the sections I found useful when using the app:
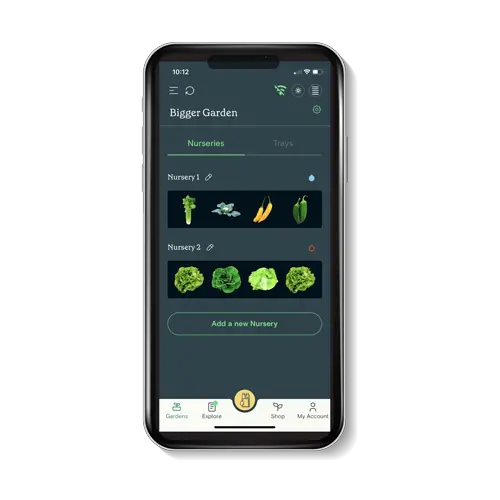
After some initial setup like account creation and syncing to the control panel in your Rise Garden, the app will start on the “Your Garden” screen. This shows the nurseries you have available and what’s germinating in each. You can easily look up the plants you are growing within the app or add your own varieties.
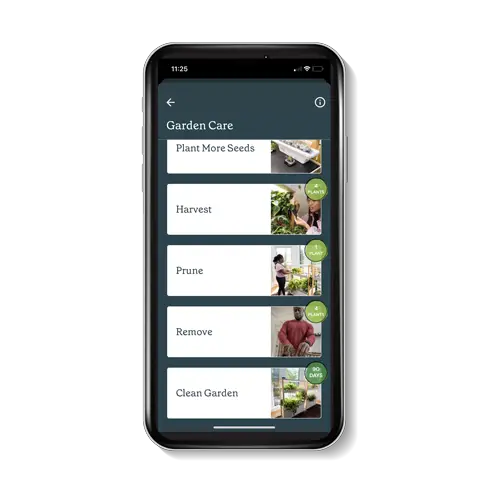
I recommend starting your grow like this since the app will track the age of each plant and send reminders for tasks that you should be doing like pruning certain plants once they get to an overgrown stage or giving reminders to harvest your fruits and veggies at their peak of quality.
Once your plants are ready to be moved into the trays there is a second tab within the app to “move them” over to the grow tray. This was handy because, in a few instances, I had planned on growing flowers like lavender in the top grow tray which has lower head space than the bottom tray. The app knew the final height of the plant would exceed the headspace I had in the top tray and recommended I move it to one of my lower available spots.
Turn Alexa into your gardening assistant.
What’s better than a hydroponic garden? A smart one! Your Rise Garden can integrate with your Amazon Eco for even more automation at your command. You can control your setup by voice when triggering commands like “Hey Alexa, dim my lights” or “Hey Alexa, check my water levels”.
It doesn’t stop there, as of 2021 the Rise system now features Smart Care which can also be activated via voice control. This allows your Garden to be less reliant on sensors for pH water levels and nutrient management by relying on an algorithm to keep track and recommend necessary steps. Don’t worry though, even if you don’t have an at-home Alexa Eco all Rise Gardens purchased in 2023 will automatically have this function enabled and accessible through the free app.
Why should you consider buying a Rise Garden
By now you should see that I’m a big fan of the Rise Garden home hydroponic system. I can confidently say it’s the best hydroponic kit on the market and really feels like it was made by garden enthusiasts FOR garden enthusiasts. Here is a summary of why I got a Rise Garden and what might be in it for you:
- Being able to grow anything I want – Any time. (especially important for those of us living through cold winters)
- Having a constant abundance of fresh, herbs fruits, and vegetables ready for harvest – The space you have to grow in a Rise Garden is leaps and bounds greater than those other tabletop models. If you’re serious about hydroponic gardening this is the kit for you.
- Pay less for fresh organic produce – I’ve worked in the grocery business for a while now and can attest to one of the downsides of always eating organic – it can come at a sacrifice of freshness.
- Save money in the long term – While the kit may seem expensive at first, once you run the numbers you actually end up saving money in the long run since each year you can grow 108 fruits, vegetables and herbs.
- The variety of tried and tested seeds for you to grow – This ties back to the by gardeners/for gardeners point I made. You can enjoy over 70 unique varieties to try, from hydroponic cucumbers to hydroponic strawberries and everything in between. All of them have been tested and proven winners.
Here is what I didn’t like about the Rise Garden
As with any review, it’s important to mention what I didn’t like about the Rise Garden so you can make a decision that’s guided more by the facts. Here are a few things I thought could be improved upon.
- I had a few issues initially connecting my WI-FI to the app, this was right around the time I got a new router so that may have played a part.
- I found it a bit time-consuming to fill up the water tank, including a siphon or tap attachment would have really helped. This was only for the first fill though since I’ve done top-ups throughout the grow.
- Free shipping is not available for non-members. Personally, I’m not big on memberships but if you plan on keeping your Rise Garden fully stocked it’s worth considering. Members get seasonal kits sent to them, access to exclusive discounts, and free shipping over $30.
FAQ
Where to Buy the Rise Personal Garden
The best place you can buy the Rise Garden is directly on their website. Here you can find the full array of Garden kits, add-ons and seeds to start growing. Since your purchasing from them directly you will be able to get the best price available.
Can I extend my rise garden later?
The Rise garden is fully extendable once the base unit is purchased. When going through the setup you will see a section that is geared toward single-level models and instructions on how to attach each additional level. Adding a level was fairly easy and only took up a few minutes of the total setup.
Final thoughts
I hope you were able to find the information you were looking for about the best at-home hydroponic kit made by Rise Gardens. It’s certainly become an obsession of mine and I’ll continue to update this post with new images of what I’m growing as they progress.
Happy growing!
Before you go!
What can you grow in your AeroGarden
How to Use Clay Pebbles in Hydroponics
Using Perlite in Hydroponics: A Complete Growing Guide
Gardyn 2.0 Indoor Vertical Garden Review