
How to grow AeroGarden tomatoes

This post follows our research editorial guidelines.
Pop a few fresh cherry tomatoes in your salad or make a bruschetta from scratch! – The choice is your as you grow your own flavorful tomatoes.
There is nothing quite like the taste of a freshly picked, vine ripened tomato. As an avid gardener this taste is rarely forgotten. It’s quite the difference between what we expect from a bland grocery store tomato. Unfortunately, we tend to sacrifice quality for convenience in our fast-paced world.
As you may know, the flavor of a freshly picked cherry tomato can range from a wide variety of flavor profiles. Some are supper sweet like candy while others have a strong herb filled flavor that is unmatched. The trouble with most grocery store tomatoes is that they are picked green and then forced to turn red by being exposed to ripening gas. This unnatural ripening, robs the fruit of sugars that would have developed otherwise.
Luckily with the help of an AeroGarden Bounty, you can grow fresh cherry tomatoes year-round from the comfort of our home. (Regardless of the season.)
You may be asking yourself; can I really grow a plant that’s typically 5 feet tall in my AeroGarden? How long will it take or is there any special care needed to ensure success. We’re quite familiar with growing tomatoes in soil and hydroponically and have some helpful steps for you to follow.
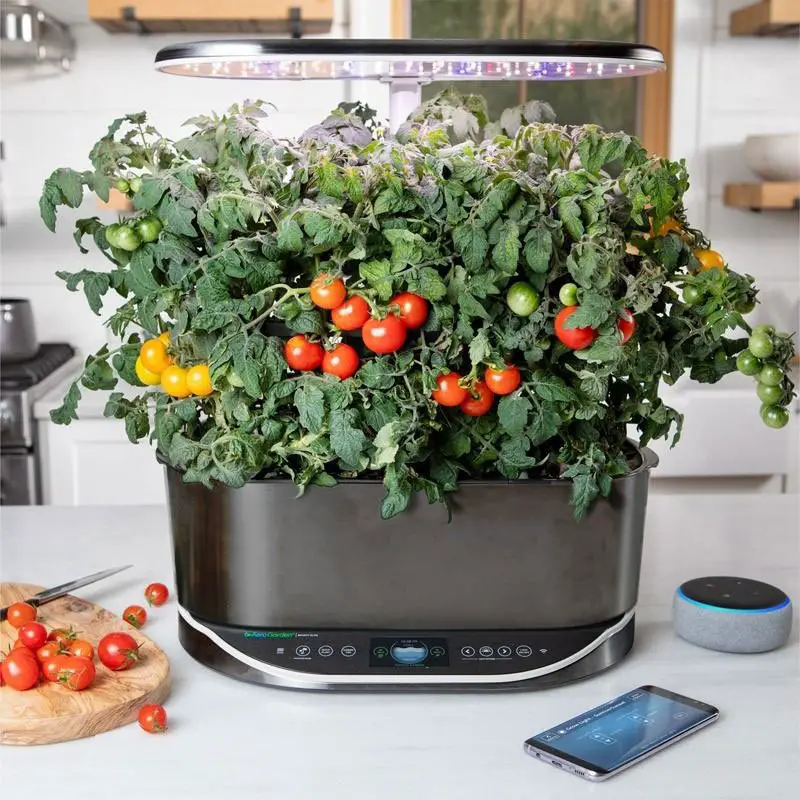
Table of Contents
Step 1: Plan and prepare your AeroGarden
As with any Garden, the proof is in the planning. Take note of the space you have available in your current AeroGarden set up. AeroGarden tomatoes grow on the larger scale of vegetables and need the proper space to flourish. It’s recommended that you leave a seed pod empty next to the AeroGarden tomatoes being positioned. This will ensure the AeroGarden tomatoes with have enough room to grow.
Next, make sure your AeroGarden has been properly cleaned and sanitized, especially if this is not the first crop your system has seen. A clean house makes for a happy plant! Now that your AeroGarden is clean go ahead and add your water.
Step 2: Plant your tomato seed pod kit
As I mentioned, tomatoes need more breathing space than most other leafy vegetables and herbs. This is why you should always leave the seed pod kit next to your tomato pod empty. This can be a hard pill to swallow when you have such limited space to begin with. You will thank me later when your tomato seeds are full grown and producing a bounty of fresh fruit.
Step 3: Configure your light and location
Tomatoes are used to strong light and warm weather. This is why growing red heirloom tomatoes in the winter are reserved for climate controlled green houses and southern states. Tomatoes love light! Set the light of your system to be 4 inches away from the top of the soil. Once the seed pods gain sprouts move the adjustable arm of the LED light to keep that 4-inch distance from the canopy. If your AeroGarden has a dim control on the light output, be sure to increase this to the greatest amount of light as possible.
Tomatoes originated from South America and will take all the light you can give them. These heirloom tomatoes have a preference for heat. To keep them comfortable be sure to store your AeroGarden away from a drafty window. A cold draft is enough to slow down the growth and harvest of any heirloom or cherry tomato.
Step 4: Feed your tomato plants well
Tomatoes have a strong appetite that matches their love for water. You won’t need to worry about watering your plants in the AeroGarden system. Only a top up of water is needed, but for the whole system to work well, you will have to feed them regularly.
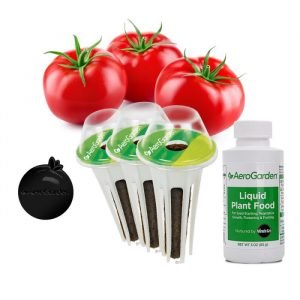
The AeroGarden system uses an easy-to-follow liquid fertilizer that is balanced well for a wide range of plants needs. The AeroGarden plant food contains everything your tomato plants will need. This includes the essential ratio of NPK (nitrogen phosphorous, potassium). Also included with the essentials are macro-minerals like calcium, magnesium and sodium.
The AeroGarden system takes the guessing work out of when to re-feed your plants. Simply hit the re-set button on the tracker control to be reminded when the next feed is due.
Step 5: Stunt vegetative growth
While this may sound counter productive,
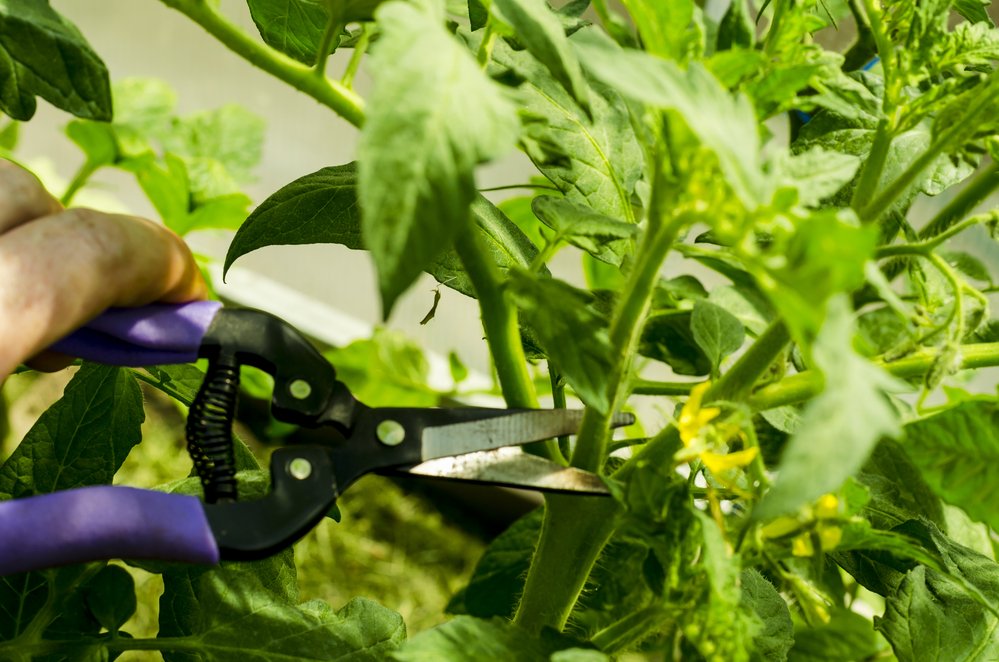
stunting the vegetative growth of your tomato plants at the right time will reward you with more fruit at a faster rate. A plant left to it’s own comforting ways will take it’s time, this is not something you want to allow or encourage. Instead wait for your AeroGarden tomatoes to grow past the stage of producing 5 nodes (picture below). This means you have 4 branches nested between the main stem and fan leaf, plus the main stem top.
With a clean pair of dry scissors cut off the top of the main stem. This practice is known as “topping” and is done at a stage when the plant can handle the stress it receives. Now you have instructed your AeroGarden tomatoes to grow 2 main stems instead of 1. This will work to increase your crop production. The stressful interaction also tells the plant that future danger may be near. As a result, the focus sets towards re-production (fruits with seeds) rather than vegetative growth like roots or leaves.
Step 6: Prune and remove the “suckers”
As your AeroGarden tomatoes grow you will begin to notice small stems shooting out of between the base and the branch. These little stems are known as suckers and should be removed immediately. Suckers have no intention of bearing fruit and will only suck the energy from the AeroGarden tomatoes that could otherwise be used for growing fruit. Like mentioned in the previous step all trimming and pruning should be done using clean and dry scissors. This will prevent the transfer of bacteria to the open wound.
Step 7: Leaf trimming
Tomatoes tend to grow bushy and will compete with other herbs in your garden for light. It’s perfectly acceptable and recommended to trim the leaves that are blocking the light of other vegetables or tomato varieties. Be sure to only trim the leaves and not the bulbs that will eventually turn to flowers, these bulbs will become fruit. As a general rule never trim more than 20% of the plants leaves at a time. This will reduce inflicting severe stress on the plant that will do more harm than good.
Step 8: Creating a support system
When you are starting to near the end of your fruiting cycle you may find that your AeroGarden tomatoes need a little extra support. This is perfectly normal and does not necessarily mean the plant is weak or dying in any way. If you are growing a large red heirloom tomato then the likelihood of your plant needing support is high. While grape or cherry tomatoes plants carry a lighter load of fruit which need less assisted support, if any. If you can see that your tomato plants are struggling, try tying off a piece of string to the top of your AeroGarden light. This way the branch of the tomato cluster can be better supported. The AeroGarden Farm model takes care of this issue by equipping a rope guard rail from side to side. This is why the AeroGarden Farm models are best suited for larger growing plants like peppers and tomatoes.
How to transplant tomatoes while they are growing
Most gardeners have the itch to grow something early on in the calendar year while the snow banks are still high. To get everything timed out perfectly, plant your heirloom tomato seeds in February. This ensures that your home-grown plants are ready for transplanting come spring. If you don’t have a grow room set up with dedicated lights and irrigation then the AeroGarden is a great place to start your seedlings for the outdoors. Here are a few tips to ensure a smooth transition to the great outdoors.
1: Prepare your tomato plants new home
There is nothing worse then being left out in the cold! The same goes for your recently plucked tomato plant. One of the biggest mistakes I’ve made as a gardener is pulling plants from the soil too soon before they were ready to be transplanted. This adds an unnecessary amount of stress on the transplant that can be avoided with a little pre-planning.
2: Mix the soil with fertilizer
One of the easiest ways to reduce the stress plants go through during a transplant is to feed them well with food the fosters root growth. Studies have shown that adding a low nitrogen and high prosperous fertilizer to the soil will help with transplant shock. The phosphorus is what helps the plant with this stress response. Since you don’t want to burn the plant with high amounts of nitrogen in the soil try remediating with powdered bone meal. As an added bonus, tomatoes LOVE the calcium that is in bone meal.
3: Trim the leaves
Before you make the pull from the pod it’s important to set your tomato plant up for success. And what better way to show them you care than with a little bit of tough love. At this stage you are going to want to cut an inch off each leaf with a clean pare of scissors. While damaging a plant right before it is about to be transplanted may sound like a bad idea, it actually helps with establishment. Cutting the leaves tells the tomato plant to focus on root development rather than leaf production. New roots are key for a speedy recovery in the new planting grounds.
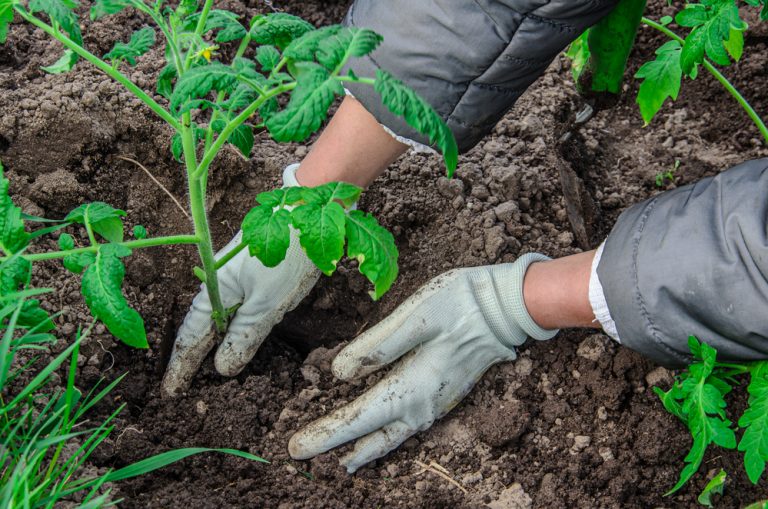
4: Remove the plant from the seed pod
Now it’s time to remove the tomato plant from the seed pod. At this point be careful to not damage the root system when you are separating the plant from the pod. A little pinch at the bottom of the seed pod on either side is all it takes. This should loosen the growing medium enough for the plant to slip out.
If the root system is overly developed then it may be too tricky to do a clean pull out of the pod. Unfortunately, this means you will have to cut through the seed pod which will destroy it for future use.
Important:
Never pull on or bend the stem of the tomato plant when trying to remove it from the seed pod. This could inflict damage to the tomato stem beyond repair.
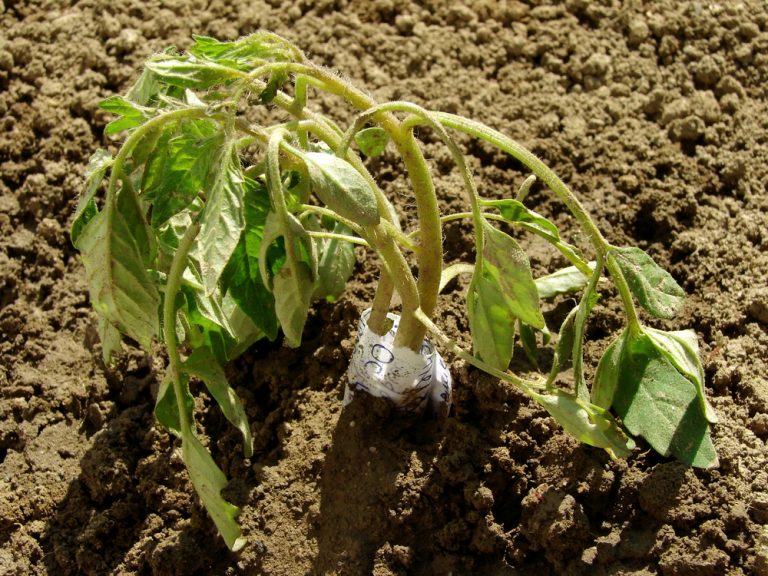
5: Plant in the soil
This may sound like a simple step that could be glossed over but there are a few key point to mention. Following these few steps will ensure a successful transplant.
Start by digging out a little hole that is 1 inch deeper that the root system. If you are planting in a pot with a bottom try to leave 2-3 inches of soil below the root system.
Once the tomato plant is in place, fill in surrounding soil and press down. Don’t worry if the soil now reaches an inch above the root zone. Tomatoes and peppers are triggered to grow new roots where the stem touches the soil (in-case they ever fall over in nature). This may slow down the recovery process but you will be rewarded with much healthier plants ready to produce a bounty of fruit.
6: Water often
The first 2 weeks after a transplant are the make it or break it weeks. If you can get bast that 14-day hump, chances are you (or your plant more specifically) is in the clear. To make the most out of the 2 weeks be sure to water your tomatoes plants often.
Depending on your climate this may mean watering every day in the early morning/evening before or after heat of the day. Watering needs will increase if you live in a particularly sunny and hot climate like those of you in the southern states.
Those living in places like California, Arizona or Texas are going to want to keep your plant in the shade during these first few critical weeks.
FAQ
Which AeroGarden is best for growing tomatoes?
All AeroGarden models aside from the AeroGarden sprout can grow dwarf tomatoes. If you’re looking to grow big heirloom tomatoes it’s best to use the AeroGarden Farm. This model allows for taller plant growth under the lights which is needed for the tomato plant to thrive.
The Miracle Grow seeds that the AeroGarden uses are selected for growing in small spaces. These “dwarf” varieties are genetically chosen to remain compact in your growing space.
If you are looking to grow large heirloom tomato plants then the AeroGarden Farm is your best bet due to the spacing of seed pods and height of the LED arm.
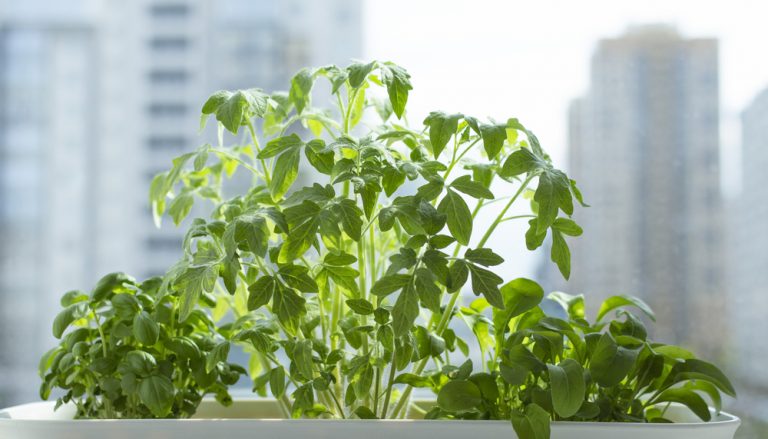
What are companion plants for tomatoes?
Tomato seed pods are best mixed among low growing fresh herbs like basil, chives or mint. These fresh herbs will have enough room and light to become well established before the tomato plant takes over and requires more light exposure.
When companion planting tomatoes in the outdoors, herbs are typically planted next to tomatoes. The stong smell will deter aphids aiming to snack on your hard-earned juicy fruit. What better way to celebrate pizza night than with some freshly gown tomatoes and basil?
Can tomatoes grow with pepper plants?
Yes! Tomatoes are actually from the same plant family as peppers which means they get along well when growing next to each other.
Just as you would space 2 tomato plants by leaving an empty pod between each of them the same goes for a tomato plant next to a pepper plant. So if you have 3 pods in a row available to plant in keep the peppers or tomatoes on the outside.
This will leave the middle space empty or you can take advantage of the gap by growing some quick to harvest herbs like chives.
AeroGarden Tomato growth stages and timeline.
Week 1: Seed germination
Let the growing begin! Seed germination can be a stressful time for many gardeners, you have planted the seeds and now you are waiting for something to sprout.
Many of us are still shell shocked from the times that seeds were planted but nothing ever sprouted. These duds happen more often when using your own seeds.
Luckily the Miracle Grow seeds used in the AeroGarden system have a 99% germination rate, so sit back, relax and let nature work its way.
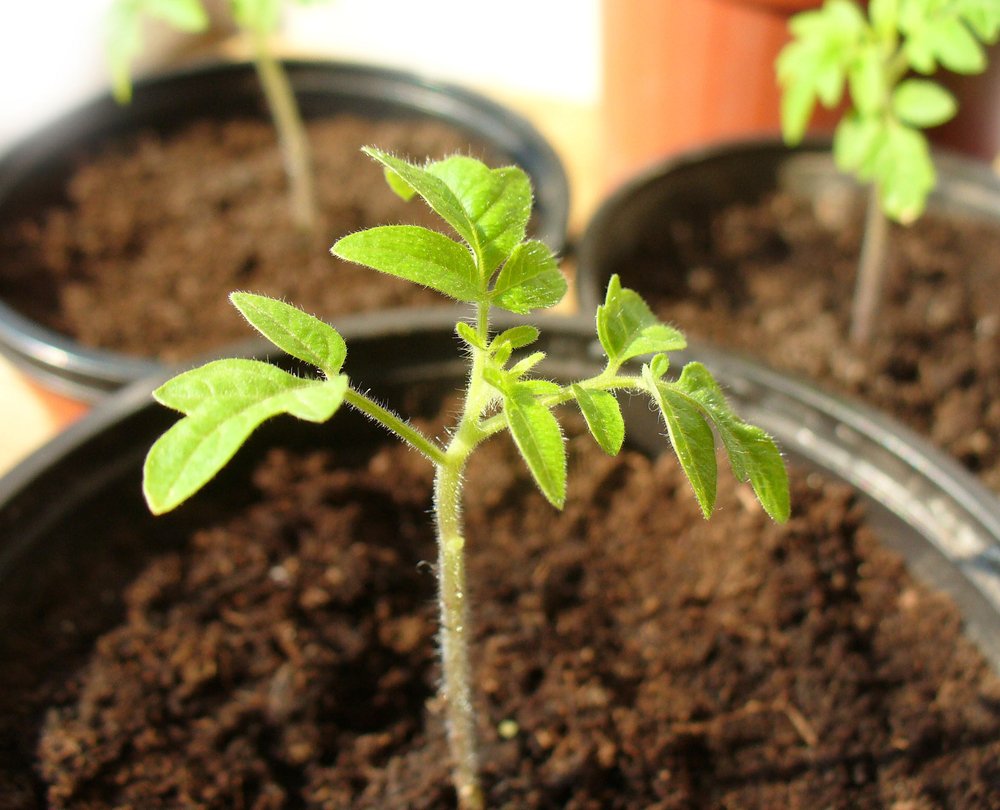
Week 2: Seedlings begin to sprout
By now you should start to see a few green heads poking up from the soil below. Since tomatoes are a large crop that need lots of space, you’re only going to want 1 seedling to survive.
In the case where you have more than 1 seedling above the soil it’s time to exercise some natural selection. Take a look at each seedling to identify the strongest one and cut away the rest that stand.
To find the strongest seedling, look for “true leaves” that have developed. These are the leaves that most resemble what a tomato leaf looks like and will differ from the baby round leaves that develop first. The healthier the true leaves look the better.
Week 3-4: Early vegetative stage
During this stage slow and steady wins the race. Your tomato plant will appear to slow down in growth for a week or 2 after forming a few nodes. The offshoots between the fan leaves will eventually turn into fruiting areas AKA tomato clusters.
It’s important during the early vegetative stage to keep humidity high near the plants. Since your tomato plants are growing in an AeroGarden which has a basin of water below each plant this will not be a problem.
It’s also why the seedling pods come equipped with little plastic domes. The younger the plant the more they will enjoy humidity.
Week 5: Time to pop the tops
By now, there are at least 5-6 nodes on the plant including the top of the main stem. This next tip may controversial to some gardeners, but I can assure you that from nearly a decade of growing my own tomatoes and peppers this trick works well.
Below the top of the stem find a clear section that is free from nearby off-shoots, take a pair of clean scissors and cut off the top.
This will slow down growth of the tomato plant for the first few weeks but will offer up 2 main stems instead of 1. The main stem is where the majority of the fruit will come from so in this case 2 main stems are better than 1.
Week 6: Stretching phase
Now that you have made it out of the woods, your tomato plants should be growing strong and fast. This is known as the “stretching” phase and is going to be your plants last ditch effort to gain height and spread out.
Since during the last phase you went ahead an popped the tops of each tomato plant, the stretching should be limited and seem a bit more under control.
If you opted out of topping then you are in for a wild ride. There have been a few times when the stretching phase came on a little to fast which nearly outpaced my light height.
So if your working with a smaller the smaller AeroGarden Bounty model then make sure you follow the week 5 suggestion of popping the tops.
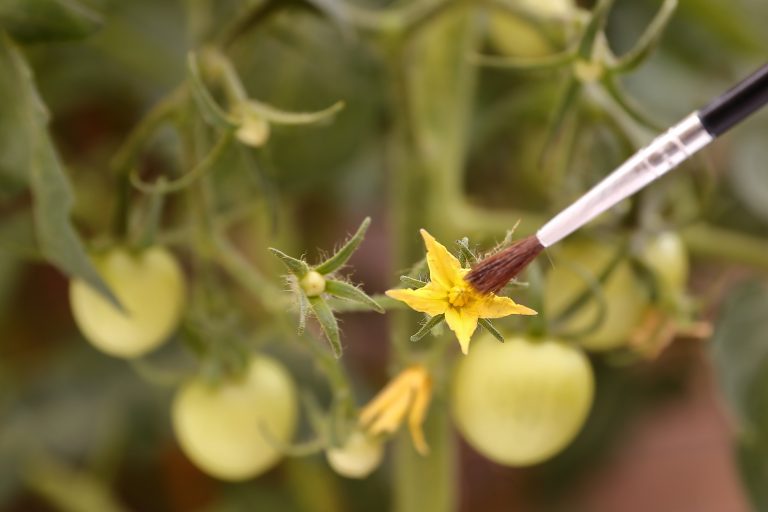
Week 7: Flowering stage
Let the fun begin! By week 7 little yellow flowers should be appearing all over your tomato plant. The flowers (if pollinated) will become the tomato’s you will harvest.
Tomatoes are considered to be “self pollinating” plants which means they do not need a bee to pollinate between male and female flowers. Instead, tomato flowers need a good gust of wind to knock some of the pollen around in the flower for the pollination to begin.
This is easily achieved outdoors but can be a bit tricky when using an AeroGarden in your kitchen. There are a few ways to approach this which we covered in more detail above.
The basic principle is to replicate wind by either brushing the pollen within the flower gently or set up a small oscillating fan to do the trick.
Either way will work well, just be careful to not damage the stem of the plant when choosing the shake down option. This will have to be done on a daily basis to get proper pollination.
Week 8-10: Young tomatoes
If you’ve followed the pollination steps in the week 7 flowering stage then you should start seeing little green tomatoes form in clusters where the pollinated flowers used to be.
Don’t worry if not all the flowers end up becoming tomatoes, as long as you’re seeing them more often then not you are on the right track.
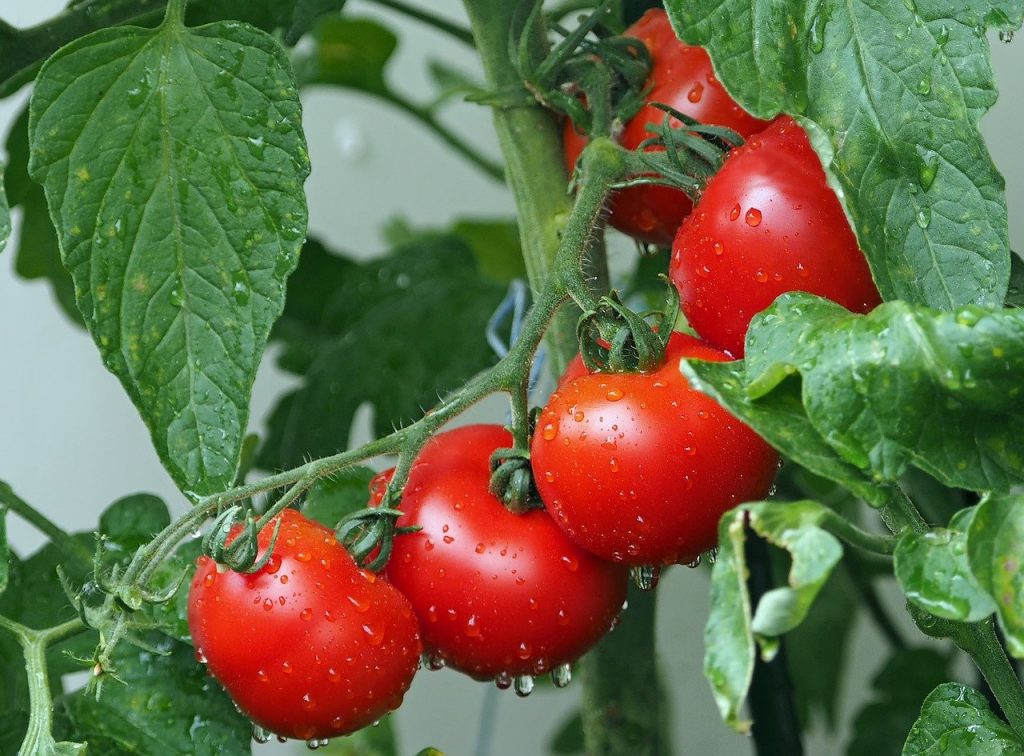
Week 11-14 Final Harvest
Depending on the variety you are growing by the 11th week the once green tomatoes should be now changing colour and fully ripening.
While some may expect tomatoes to turn red, this isn’t always the case. Some heirloom tomatoes turn yellow, bright orange or even dark purple.
This can be the fun part about growing your own seeds in an AeroGarden system since the variety of unique heirloom and cherry tomatoes are endless!
When the green spots fade away from the fruit and the colour is fully developed, it’s time to dig-in and enjoy your bounty of freshly vine ripened tomatoes.
IMPORTANT!
Collecting and trying new seed varieties in your AeroGarden can be a fun way to try something new. It’s important to note that most tomato, pepper and eggplant seeds provided in the AeroGarden pods provided are specifically bred to contain dwarf genetics.
This means the plants are sure to stay small enough in your system to not grow past the LED grow lights. Some heirloom tomatoes can grow to be 6 or 7 feet tall!
At this rate even the AeroGarden Farm-24 is not big enough to handle that sort of growth. So, if your not sure if the seed is right for your model stick with the tried and true seed pods provided.
Before you go!
Clean and Sanitize your AeroGarden for Hydroponic growing
Hydroponic Mint (Key Things Beginners Need to Know)
How to Choose a Hydroponic Grow Sponge + Which Ones You Should Avoid…
How To Grow The Best Hydroponic Tomatoes: From Seed to Savory