How To Grow The Best Hydroponic Tomatoes: From Seed to Savory

This post follows our research editorial guidelines.

Hydroponics is a soilless plant-growing technique that lets you grow juicy, nutritious, and tasty vegetables without worrying about physical properties, pathogens, and the overall quality of the soil – or the mess that comes with it.
Besides leafy greens such as lettuce, the fantastic news is that you can produce one of the world’s most popular edible fruits – tomatoes – in a hydroponic system as well.
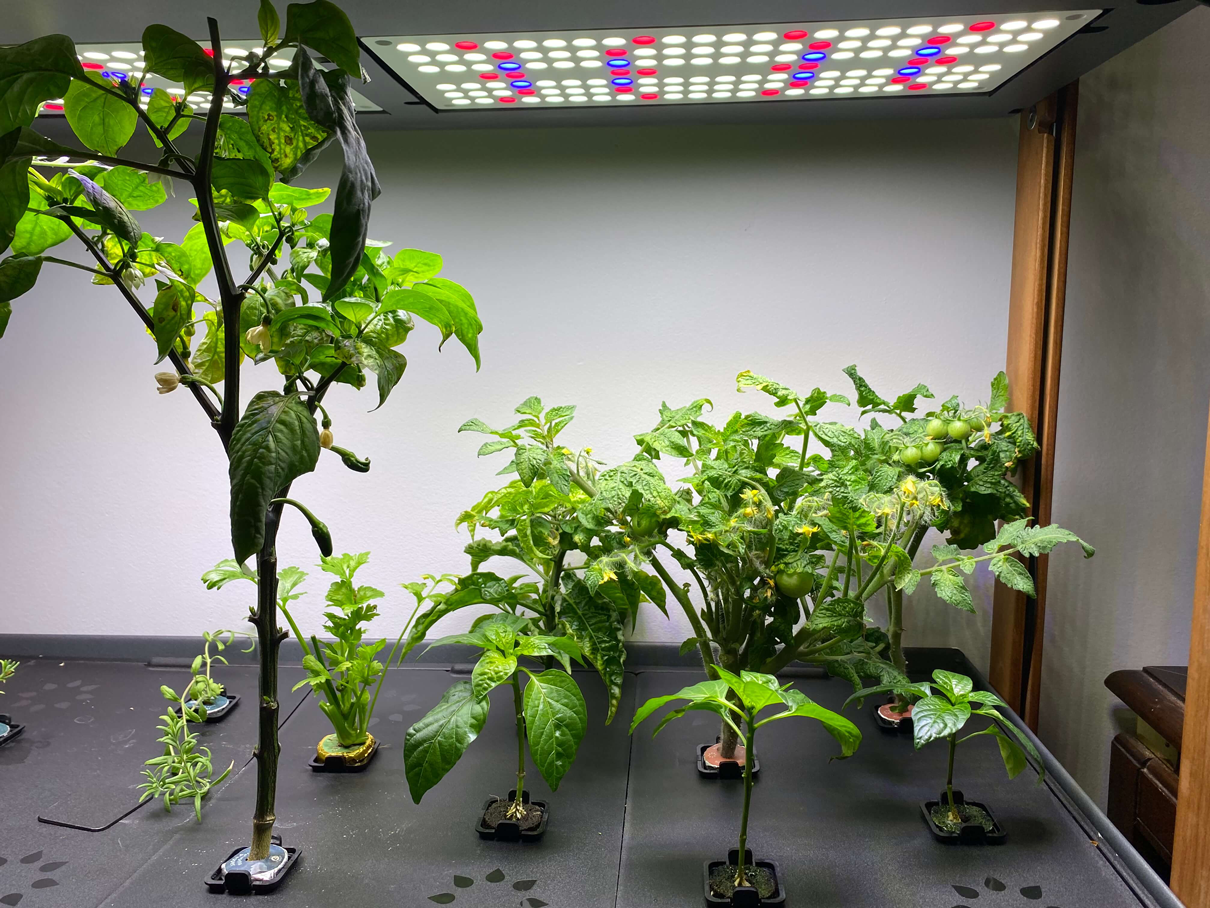
Today, I’ll help you learn the essentials of hydroponic tomato growing.
What does it take to grow hydroponic tomatoes? Is it too hard? What systems are best to use, and what nutrients will keep the plants healthy and make the fruits flavorful and juicy? If you have been wondering about any of these questions – this is an article for you. Read on!
Table of Contents
Do tomatoes grow well in hydroponics?
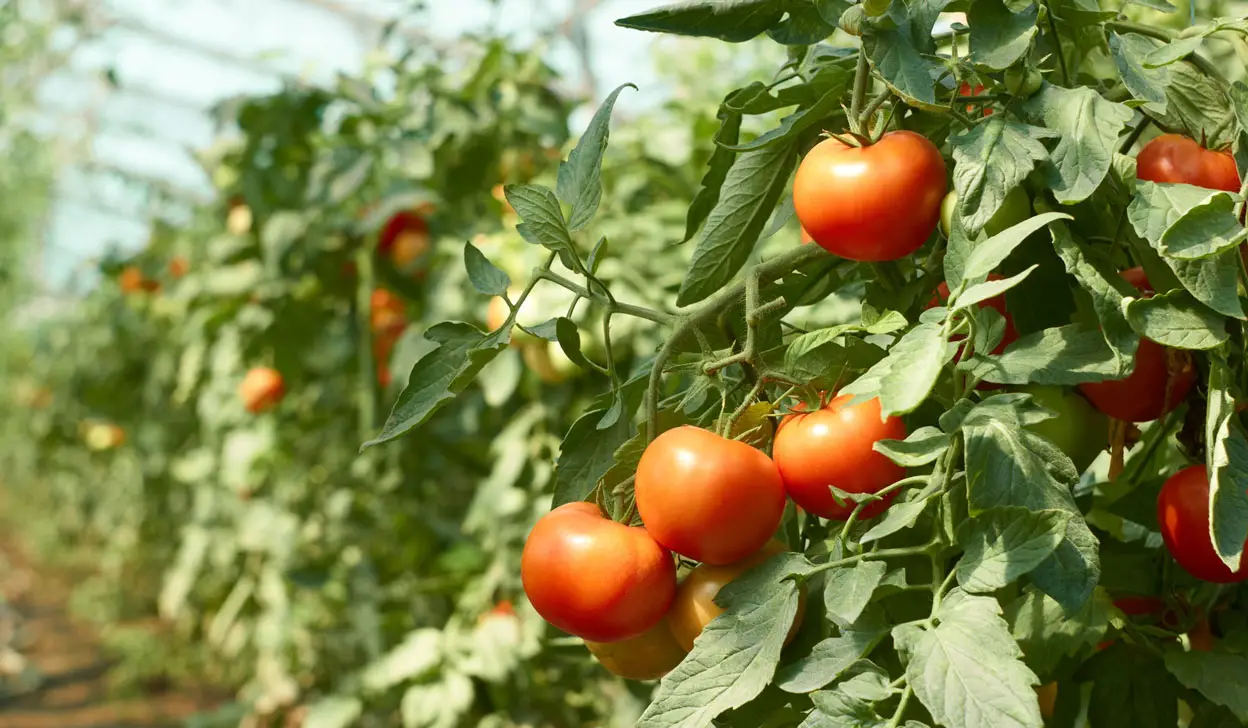
Yes, tomatoes are the most commercially abundant hydroponic crop globally. These plants are the perfect contender for hydroponic growing.
If you provide the plants with the right nutrients, adequate lighting, and proper physical support, tomatoes will thrive in a hydroponic system and produce fruits of equal quality to soil-based tomatoes – or better.
There are a few things to consider:
- Choose a hydroponic system that is right both for tomato plants and for you. Tomatoes are most commonly grown with the Ebb and flow technique, Nutrient film technique (NFT), and Deep-water culture (DWC).
- Other simpler methods, such as Kratky, are also used by some growers; however, with non-circulating passive systems such as this, it can be challenging to ensure proper nutrient balance for a demanding crop such as tomatoes.
- Choose tomato varieties that are proven in hydroponic systems
- The right choice of nutrients (fertilizers) is essential for proper vegetative and fruit development. While, of course, it is important not to overdo it, if you want to get a bountiful hydroponic tomato harvest, don’t save up on the nutrient solution either.
- If your looking for a “done for you” system check out the AeroGarden hydroponic kit or my personal favorite the Gardyn hydroponic system.
How long does it take to grow tomatoes hydroponically?
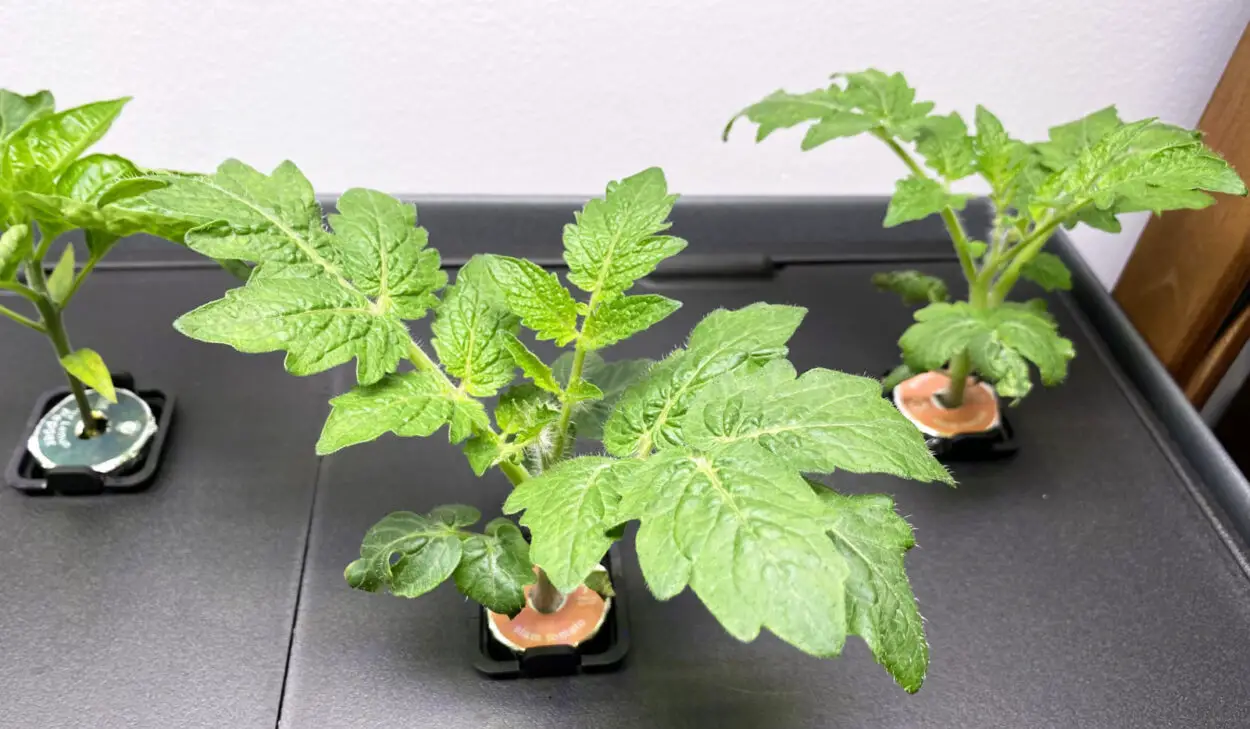
The exact time for tomato development in a hydroponic system depends mostly on the tomato variety, with the size of the fruits making the greatest difference. Small-fruit varieties, such as miniature cherry cultivars, can be ready for picking in a month and a half; on the other hand, larger varieties, such as beefsteak, need around 90 days.
3 Varieties of tomatoes that grow well hydroponically
Not all tomato cultivars are suitable for hydroponic systems. However, others are ideal and widely grown. Here is a short list of the most commonly grown types.
Cherry tomatoes
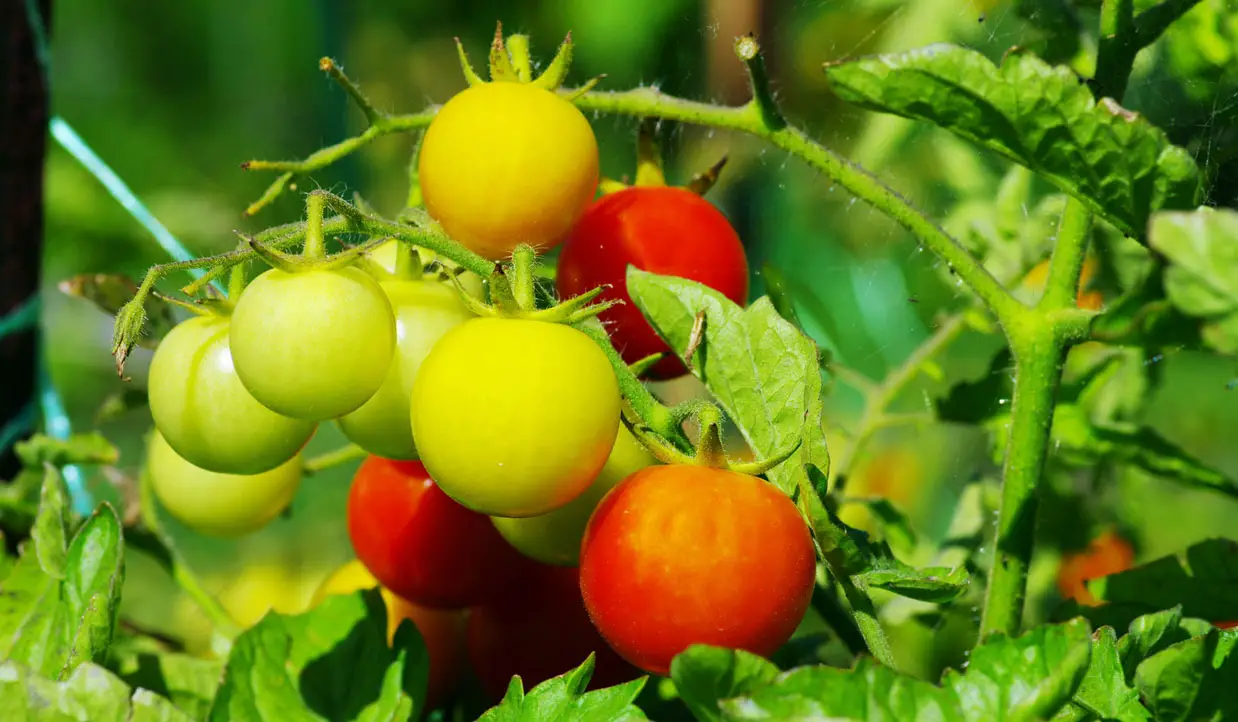
Famous for their undersized fruit, cherry tomatoes mature and ripen quickly, often have compact growth, and provide an exceptional selection of fruit sizes, colors, and shapes. Many cultivars also produce fruits that store well and have a long shelf life. There are plenty of compact varieties, so it is no wonder that many cherry tomato cultivars are extremely popular for hydroponic growing.
Beefsteak (‘Trust,’ ‘Matrix,’ ‘Geronimo,’ ‘Jelona Yellow,’)
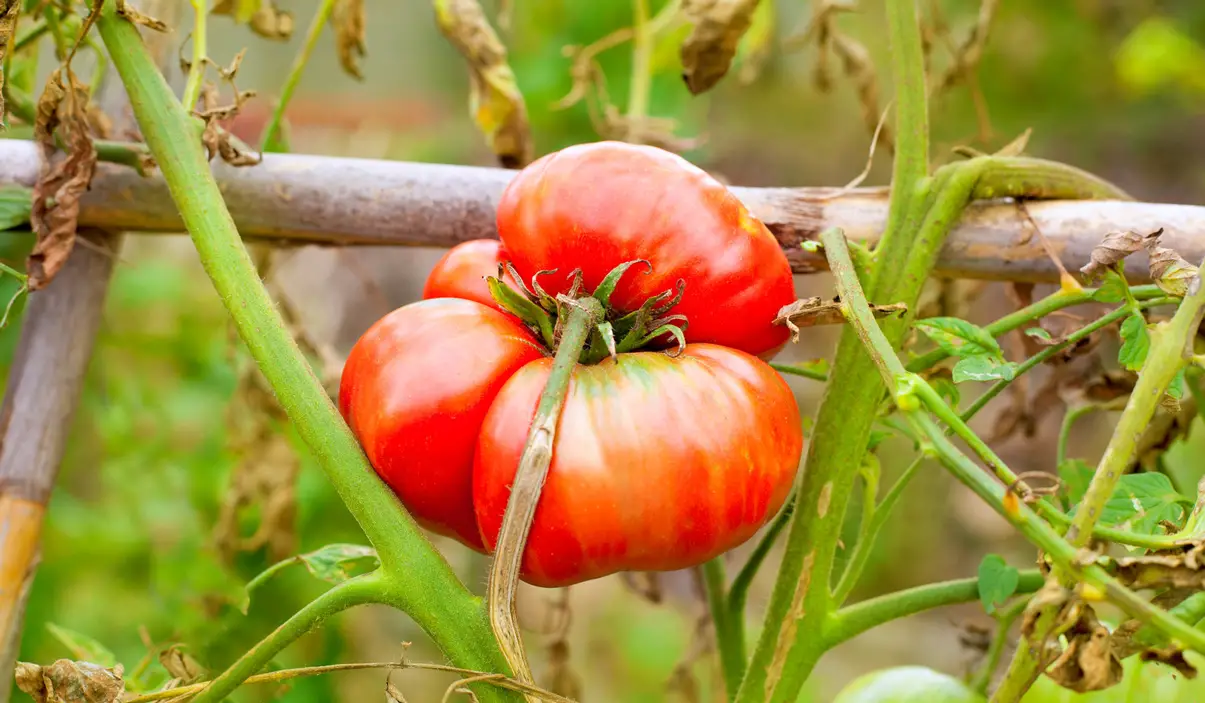
Medium-sized beefsteak varieties are another popular group of hydroponic tomatoes. The intermediate varieties still produce fruits that are quite large (7 to 8 oz, on average for the listed cultivars), have a meaty texture, and have a sweet, “classic” tomato flavor.
A number of cultivars produce colors other than red – yellow, orange, and pink. ‘Trust’ is one of the most popular hydroponic and greenhouse tomatoes in general. It provides high yields of fruits that are firm, ripen evenly, and have an extended shelf life.
Cluster Tomatoes or “Tomatoes on Vine” (‘Clarance,’ ‘Tricia,’ ‘Ambiance,’ ‘Tradario’)
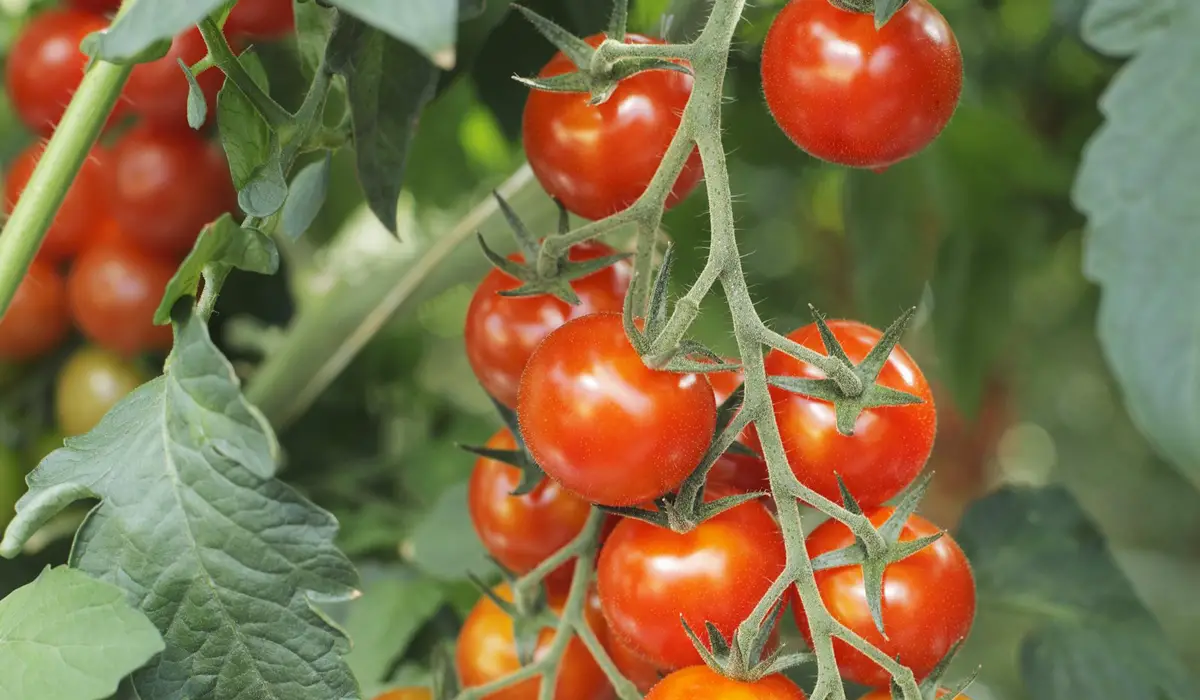
As their names suggest, cluster tomatoes grow in clusters or bunches on a vine, which is their defining characteristic. Another one is the deep red color, which stands out beautifully against the green vine, and last but not least, the rich flavor.
Other properties, such as shelf life, differ among particular cultivars. Cluster tomato varieties were created purposefully for the greenhouse crop industry, so it is not surprising they also grow well within hydroponic systems.
Starting tomato seeds in a hydroponic system
Growers usually start their hydroponic tomatoes from seeds.
You won’t start the seedlings in the same containers you intend to grow them in, though. Instead, opt for special germination trays. You can use rockwool cubes or Rapid rooter plant starters. As the name suggests, rapid rooter has a special set of nutrients to ensure strong root growth.
Using rockwool cubes for tomato germination is easy-peasy. Just tuck the seeds into the rockwool and water generously.
The temperature the seedlings need to germinate is between 70 and 80 degrees Fahrenheit. You can use a sunny windowsill to ensure enough heat. If it’s currently chilly where you live, feel free to use a heat mat. The seedling should appear in 5-8 days if everything goes well.
You can transfer the seedlings into the hydroponic system when they are around 7 inches tall. How fast they’ll grow from there depends on the cultivar – as I mentioned earlier, the smaller varieties, such as cherry, cocktail, and miniature types, usually mature faster than larger varieties – 45-70 days on average.
What is the best container to grow hydroponic tomatoes
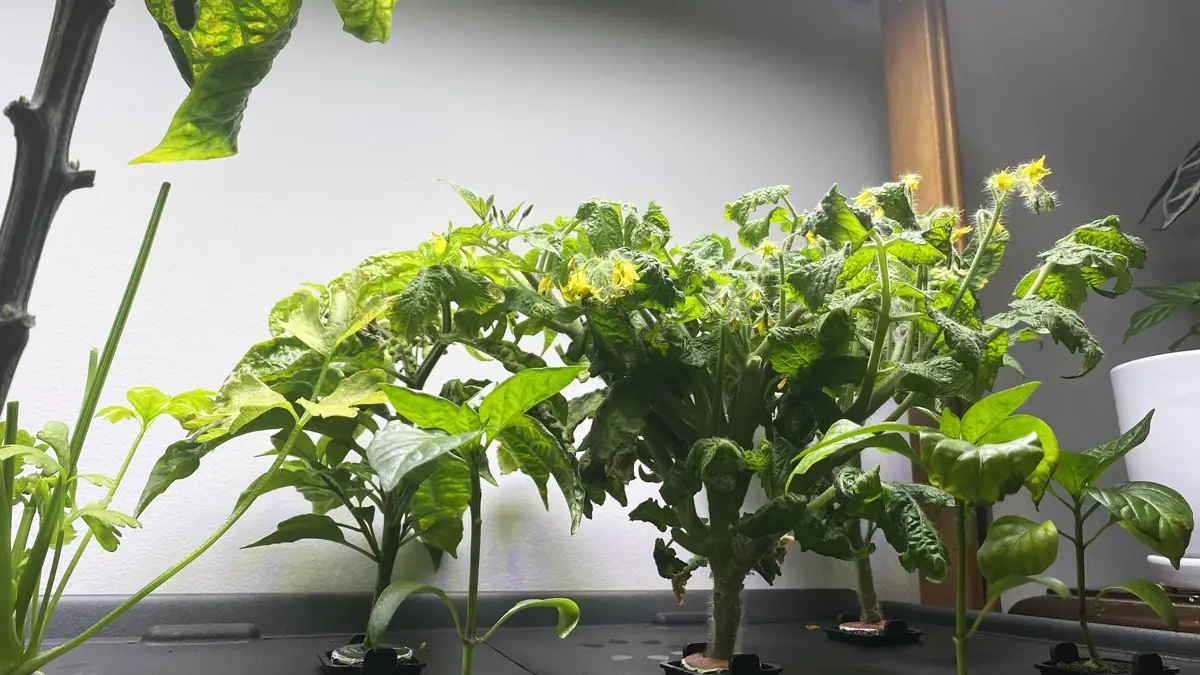
Hydroponic tomatoes are quite large plants with rich vegetative parts that require support. Therefore, the shallow media bed won’t do. You need at least a five-gallon hydroponic bucket per plant for them to feel comfy. Unless your growing a dwarf grape or cherry variety like the one above. In this
Also, as tomatoes are vines, they require structured support to grow upwards and carry the fruit.
There is a method that is both simple and fulfills all the abovementioned tomato space requirements – the Dutch Bucket.
Using the Dutch Bucket method for hydroponic tomatoes
The Dutch bucket (or Bato bucket) method is one of the most straightforward recirculating systems to use with hydroponic tomatoes (or other demanding veggies). It is a beautifully minimalistic concept that still ensures that still meets all the demands of a healthy hydroponic culture.
The Dutch bucket method is based on a system of growing containers (“buckets”) that are mutually connected and share the same nutrient solution through mutual drainage and irrigation lines. The nutrient solution is pushed from a reservoir into the buckets via a pump; then, it automatically drains back to the reservoir, or is drained out of the system.
The buckets create individual units instead of a unified media bed, which has several advantages.
- You don’t have to oblige to grow many plants – everything goes from two buckets to beyond.
- You can space out larger crops (like, you’ve guessed it – tomatoes) without wasting media.
- If a plant disease or pest infestation strikes, you can easily isolate or remove the affected plants without risk to others in the same system.
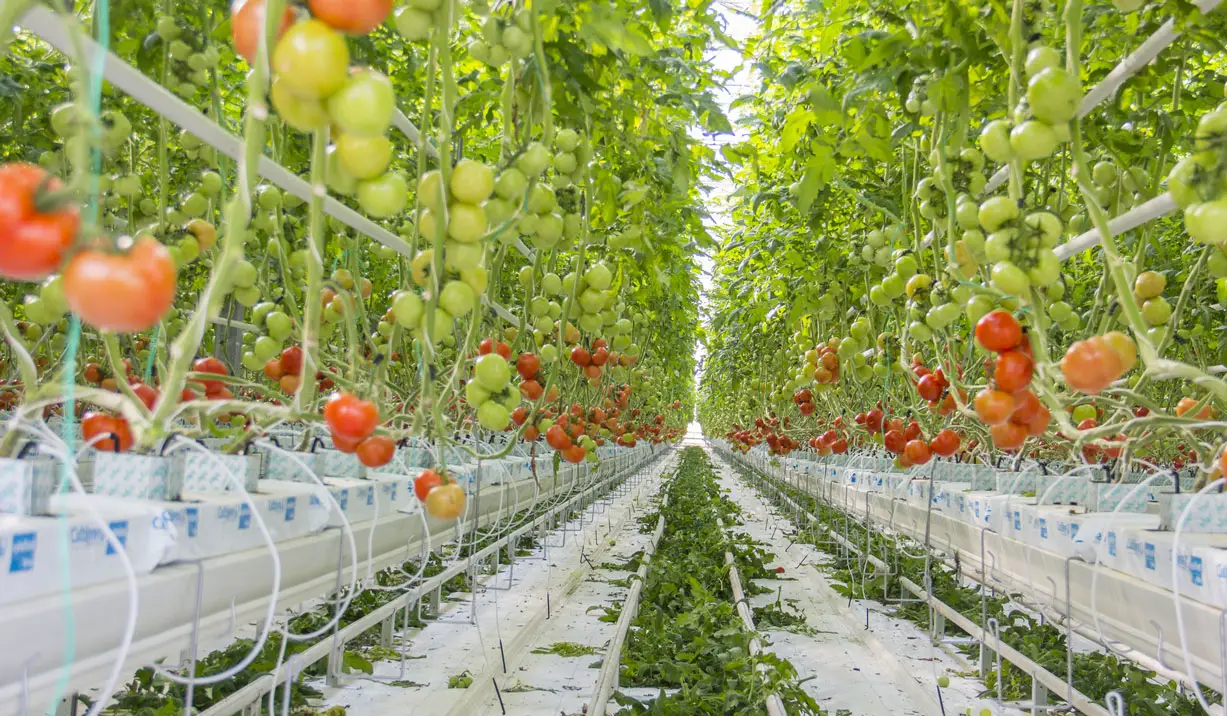
Besides the obviously-simple setup, Dutch bucket systems are extremely water and nutrient efficient. This method can easily support the vines with large fruits – such as tomatoes, peppers, and cucumbers – both physically (climbing-friendly) and biochemically (nutrient balance, oxygen).
How to get started
By now, you’ve probably figured out that growing tomatoes hydroponically is possible – I believe I’ve presented enough evidence, even for the suspicious readers. Still, the idea of how exactly to pull it off is still sort of hazy, right?
Let’s dive into more detail on how to grow hydroponic tomatoes successfully (don’t worry, I won’t make you dive into a Dutch bucket).
Container
The “bucket” you need for tomato growing is a five-gallon or ten-gallon hydroponic container – or an actual bucket. Unlike the passive water-based Kratky method, The Dutch bucket system requires growing media – most commonly, it’s vermiculite. Still, you can also use hydroton clay pebbles, perlite, crushed granite, or coconut coir.
Pump
The reservoir pump is the heart of your Dutch bucket system – it pumps the precious nutrient solution through a straight (pipe) line over the containers. The dippers on the line control the flow of the solution to each bucket.
As the Dutch bucket is a variation of the Ebb-and-Flow system, the type of pump you need is a submersible water pump. The rule is simple – the more buckets (and plants) your system, the stronger the pump has to be.
Light
Although they can tolerate down to 8 hours of daylight, the optimum amount of light for producing tomato plants is 12-16 hours.
Southern greenhouse growers likely won’t require additional lighting through most of the growing season, except perhaps in the winter. However, in most temperate northern regions, you’ll need to supplement autumn, winter, or early spring tomatoes with additional lighting.
Also, if you’re trying to grow hydroponic plants in the basement… Well, it’s really a no-brainer.
Although you can go with warm plus cold T5 fluorescents, the special LED Grow lights are the most energy-efficient – and equally effective.
However, putting too much above-head artificial lighting will support too much leaf growth; the fruits need the light to mature correctly, and all the foliage will shade them. However, cultivars with shallow canopies (e.g., single-truss plants) may benefit from such lighting regimen.
Water and pH
Water quality is essential for hydroponic production but varies significantly from place to place. Out of all possible water sources (ground, tap, well, etc.), the most ideal and neutral water resource for hydroponics is rainwater (although it may contain more sodium if you’re in a coastal area). Thus, collecting rainwater may be highly beneficial if you’re planning on a long-term hydroponic affair.
Tomatoes prefer neutral water pH of 5.5-6.6. If the pH is unfavorable, it can lead to various issues, including conditions such as blossom end rot (see below).
Nutrients (NPK)
Tomatoes are famously nutrient-hungry due to their rich fruit production. That is especially true for high-yielding modern varieties – truth be told, they’re nutrient hogs. Hydroponics enables plants to grow and produce more than their garden counterparts. However, they still need the “material” – the essential plant nutrients that meet the specific needs of tomatoes.
Fertilizer blends specially formulated for tomatoes usually have a 4-18-38 NPK ratio and are the safest option to ensure these basic nutrients – nitrogen, phosphorus, and potassium, respectively. Also, you will need a source of calcium (usually in the form of calcium-nitrate), magnesium (Epsom salt), and other micronutrients. It is best to provide nutrients in slightly different ratios depending on the plants’ growth phase.
I won’t lie to you – getting the nutrient regimen right is usually the most complicated part of hydroponic tomato growing and usually includes a degree of trial and error. If you really want to get to the bottom of it, you can try to calculate your ideal nutrient solution recipe yourself.
Growing support
As I’ve mentioned before, tomatoes are botanically vines. Unless you’re growing compact varieties only, your tomato vines will need to be trained to grow upwards. Since the Dutch bucket system lets you set it up any height you like, it is definitely vertical-growth-friendly. Use suitable trellises or ropes to help your plants grow up.
As you’ll learn below, indeterminant tomato varieties need a much sturdier support structure than the determinant ones.
Ventilation
To avoid fungal diseases, ensure that your tomato room or greenhouse is well-ventilated by setting up suitable fans to increase air circulation. That is especially true if growing in winter when you have to use additional heating, and the humidity is running high.
Pruning tomatoes properly can also help improve air circulation.
How long do tomato plants live?
When growing tomatoes outdoors, there is a climate-imposed limit to the duration of the season – the winter comes, and the tomato plants are doomed.
However, when growing the vines indoors, you are not limited by the time factor. If you provide the proper care, the tomato plants can keep producing fruit for a year – 8 to 12 months per year, on average.
In that respect, there is a difference between varieties – the determinant and indeterminant tomato cultivars.
Determinant tomato varieties
The determinant tomato cultivars grow to a determined (fixed) size and then stop. Thus, they are commonly known as “bush tomatoes” and don’t need to be pruned. Also, they deliver all of their fruits nearly at once – they ripen over about two weeks, after which the plant will start to fade. That means the plant’s lifespan is around three months or even less.
The fruiting season is shorter, but you’ll get many fruits at once – quite useful if you’re growing for a market.
Some popular determinant tomato varieties suitable for hydroponics are ‘Tiny Tim’ and ‘San Marzano.’
Indeterminant tomato varieties
The vines of indeterminant tomato varieties grow indefinitely, which is why they are called “vine tomatoes.” They flower and put out fruits continuously, thereby extending the harvesting season. However, these plants need strong physical support.
In garden conditions, the indeterminant varieties keep producing until the frost kills them. However, there is no frost in greenhouses. In ideal greenhouse conditions, they can remain alive and productive for 3-5 years!
Most cherry-type and heirloom cultivars are indeterminant. Also, one of the most popular hydroponic tomato types – the ‘Beefsteak’ – belongs to this group.
Common problems growing hydroponic tomatoes
While hydroponic greenhouse tomatoes are spared many pests and diseases that strike soil-grown plants, some specific conditions still affect them. In most cases, they are affected by nutrient deficiencies that can have various manifestations.
Here are some of the most common ones.
Blossom end rot
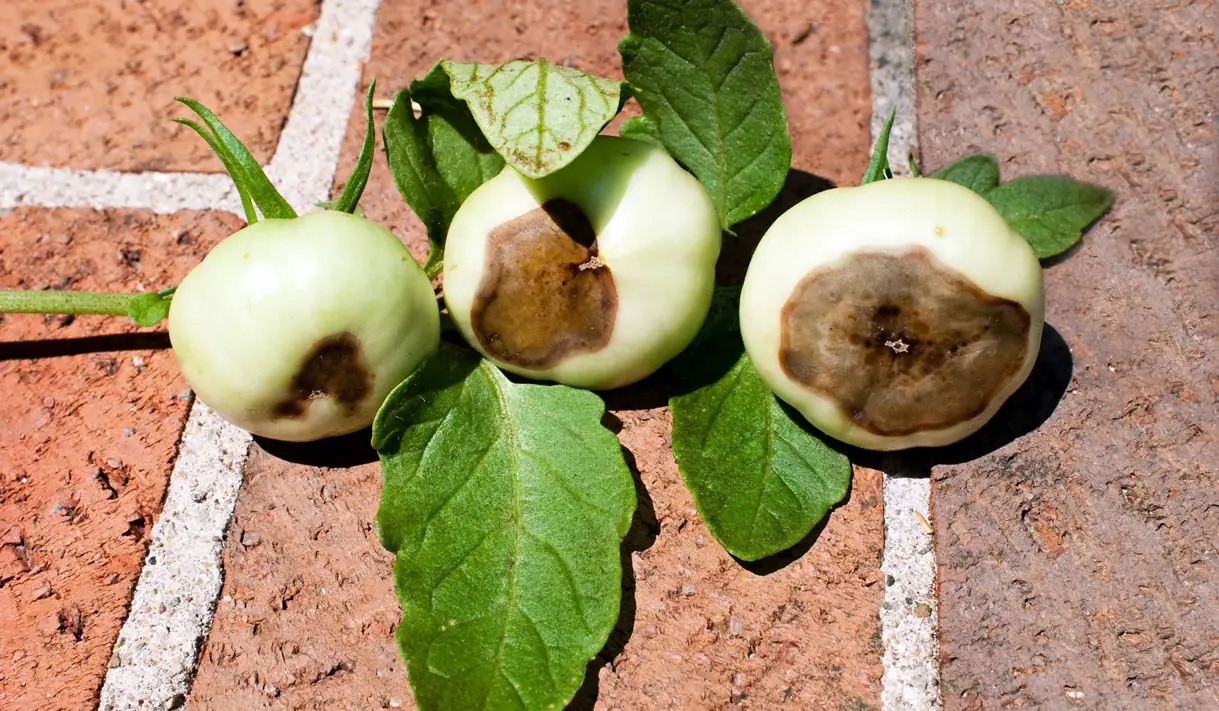
Blossom end rot is a disorder where the bottom part of the fruit – the blossom end – blackens and rots. While it looks like a fungal or bacterial disease, blossom end rot is most commonly caused by nutrient deficiency, especially by the lack of calcium and magnesium. Therefore, the best prevention is to watch out for Ca and Mg levels. Us
Scientists have estimated that the ideal concentrations for fall greenhouse tomatoes are 300 mg (Ca)/50-80 mg (Mg) L-1. Starting the magnesium concentration at 50 mg L-1 and steadily increasing it to 80 mg L-1 towards the growth season’s end will not only prevent the blossom end rot but also produce better fruit firmness.
Also, blossom end rot can sometimes be caused by an inadequate pH. Make sure that your tomato-growing hydroponic solution is neutral – pH 6-6.5
Interveinal leaf chlorosis
Interveinal leaf chlorosis is a pathological discoloration of the foliage that occurs between veins. The leaves become predominantly white or yellow. The affected leaves have a significantly lowered photosynthetic capacity; thus, the plant cannot synthesize enough food and becomes weak and unproductive.
Again, the cause of leaf chlorosis can be a nutrient deficiency. The magnesium deficiency will cause the leaves to become yellow from the ground up, while the lack of iron discolors the younger leaves first, as well as the leaf base. In severe cases of iron deficiency, the leaves can become fully bleached.
To prevent these and other nutrient issues – and to ensure a fruitful harvest – it is important to monitor the concentrations of nutrients in your solution and understand their interactions – for example, the potassium-calcium-magnesium balance.
Pests
While hydroponics allows you to forget about some pests, such as soil nematodes, others unfortunately thrive in warm, humid greenhouse conditions. While less common, indoors pests like tomato hornworms can cause havoc on a ripe tomato plant.
The most common pests we see in hydroponic cultures are:
- Aphids,
- Whiteflies, and
- Spider mites.
If you’re lucky to own a greenhouse, introducing natural predators such as ladybugs and lacewings can help you regain control. If not, look into alcohol or oil-based organic sprays, DIY or store-bought. For any environment, I always recommend simply squeezing the colonies with your fingertips to reduce their numbers while doing regular plant check-ups. Don’t be squirmish.
Spider mites thrive in dry conditions only – regularly misting the plants will go a long way in preventing their spread.
Final Thoughts
Many beginner enthusiasts see hydroponic tomatoes as a summit of hydroponic crop growing. As I’ve (hopefully) managed to communicate via this article – reaching this summit is possible.
As with any challenge, do your homework well and stick to the instructions – ensure you feed and support your tomato plants as you should. Then, you’ll enjoy the literal, fresh fruits of your labor in no time.
