
iHarvest review, setup and hydroponic comparison

This post follows our research editorial guidelines.
If your anything like me you go to the grocery store or farmers market and buy as many colorful veggies as your cart will fit. The trouble is, by the time you’re ready to use it much of your favorite herbs and greens have all but wilted in the crisper waiting for their time to shine.
At home hydroponics solves this,
By using up a small amount of space in your house or apartment, only grow what you need with the iHarvest hydroponic system. If your new to hydropoincs, great! You’ve come to the right place. I’ll go into full detail here on what to expect when setting up your iHarvest along with some general tips to help you grow the best dang lettuce you’ve ever had.
Attention Garden Lovers: This post contains handpicked links to recommended gardening products. If you buy something through these links, I may earn a small commission at no extra cost to you.
Table of Contents
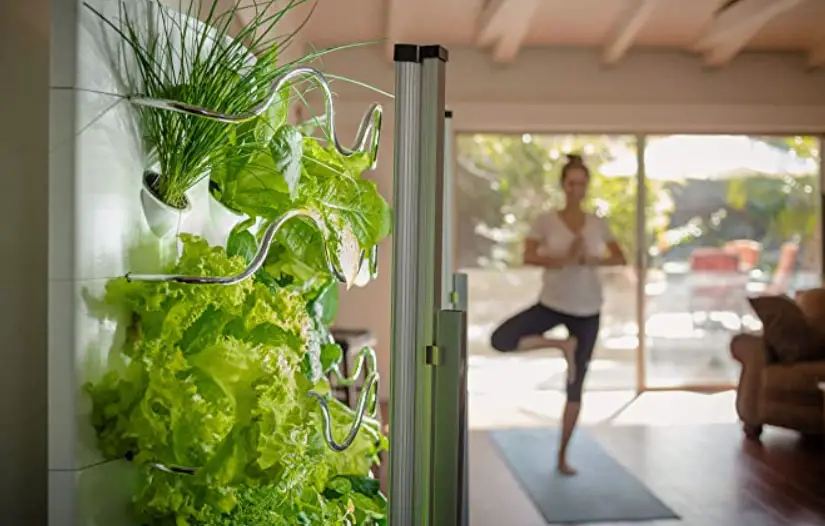
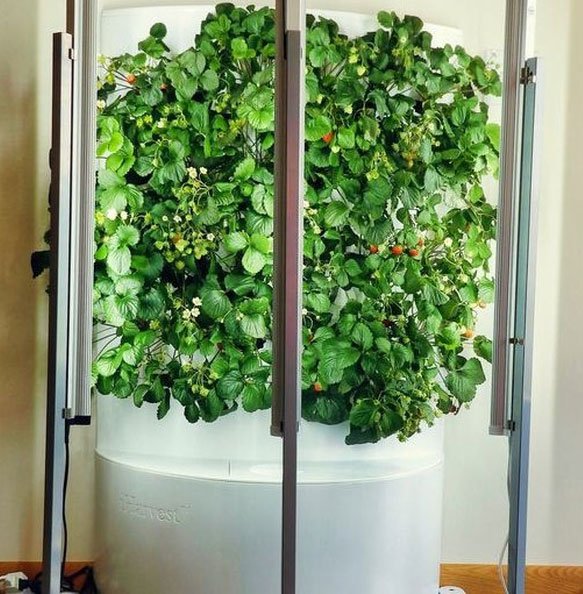
For those keen on maintaining an indoor garden but are concerned about floor space, iHarvest is the perfect solution. This hydroponic system by Indoor Garden Works (IGW) offers several benefits for easy gardening with less maintenance and faster results.
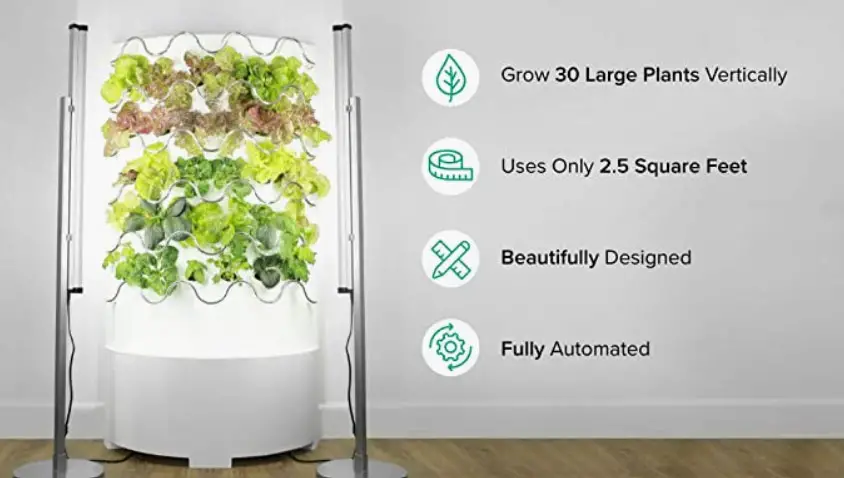
This fully automated system is a vast improvement over traditional indoor gardens, with a simple and beautiful design. Growing healthy and delicious food in a soil-less system with less water and nutrients only gets as good as it can with iHarvest.
It allows for growing herbs, fruits, vegetables, leafy greens, or even flowers. The best part is that you don’t have to worry about your plants getting enough water or sunlight, as the fully automated system takes care of it all.
If you’re a serious indoor gardener like me and want to get started with iHarvest, let me tell you all you need to know to take the leap!
iHarvest Hydroponic Systems
Hydroponics is the most efficient way to grow plants. This method of growing doesn’t use soil; instead, the plants grow in water and are fed using a specialized plant food formula . The roots are suspended in a chamber with the nutrient-rich water dripping over them.
With technological advances, hydroponic systems have considerable control to reciprocate environmental changes. This includes controlling the temperature around the plant, adjusting the pH balance, and providing increased exposure to water and nutrients.
On average, plants growing in hydroponic systems require almost 90% less water than in regular gardening. At times, they have a faster growth rate, taking about half the time.
If you’re tight on space or the environment around you isn’t suitable to grow indoor plants, I’d say the iHarvest system is a highly viable solution.
Where to Buy iHarvest
The iHarvest can be purchased directly through the official Indoor Garden Works website or from Amazon. If they’re sold out, you could pre-order them on their website.
This high-end hydroponic system can cover the initial cost by producing an equivalent amount of plants and vegetables in a year, making it well worth the investment in the long run.
IGWorks’ program with Affirm provides 0% financing for as little as $71 per month.
What’s Included in Your iHarvest?
Here is a list of all that’s included and needed to set up, plant, and grow your first successful harvest in the iHarvest.
1. Reservoir
A 17-gallon reservoir to be filled with water and nutrients every couple of weeks is at the base of the iHarvest system. This has a reservoir cover over it and an access point cover to fill it.
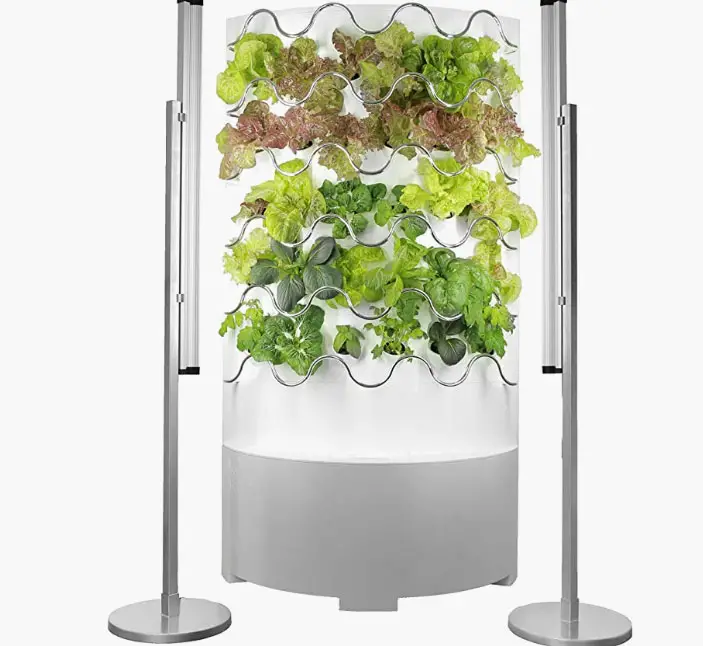
2. Garden Wall
A simple plastic wall holds the plants. With a top cover, it has 5 removable sections. Each of the 5 rows has provisions for holding 6 plants, resulting in a total capacity of 30 plants.
3. Reservoir Net
A small net inside the reservoir prevents plant debris from getting into the reservoir and pump.
. Water Pumping and Tubing
A water pump with 4 small suction cups is attached to the bottom of the reservoir. This functions to pump water from the reservoir to the top of the unit, providing all the plants with water and liquid nutrients.
The pump’s water is distributed to the plants as it passes along each plant’s root system through the tubing.
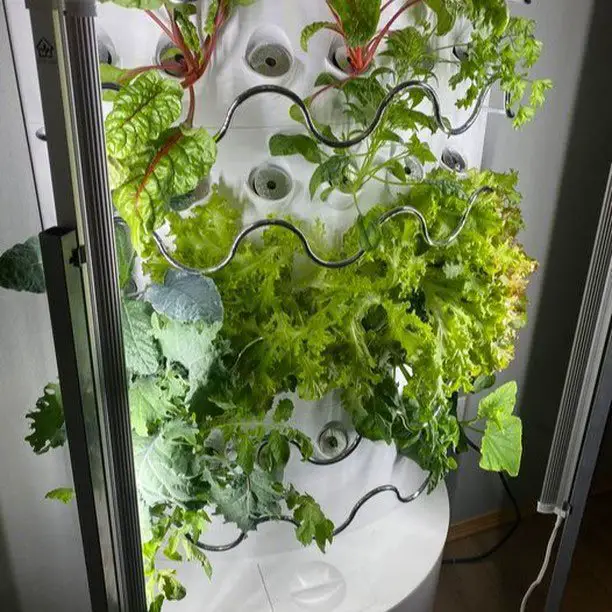
5. Trellis
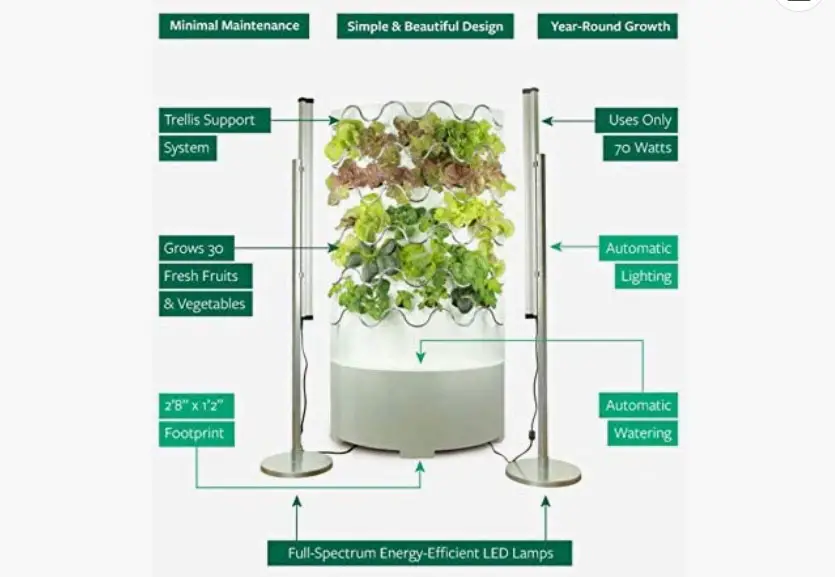
Each row of the iHarvest has the trellis along the entire length. With the trellis support system, larger or hanging plants and fruits like squash or cucumber can be grown with the support they need.
6. Full-Spectrum LED Lights and Stands
The iHarvest gardening system has 2 high-efficiency LED lights that provide a powerful and efficient light spectrum to mimic sunlight.
Each lamp uses about 36W of power, producing a total power of 72W for both the low-energy LEDs. These lights can be moved around, keeping them closer to the plants that are in the seedling form and moving them away once the plants have grown.
The LED lights are automated as well, allowing you to set the times for the lights to turn off and on (mimicking sunset and sunrise times). This is an especially helpful feature if you tend to be absent-minded.
The lights can also be used for light therapy and combating seasonal depression in plants.
Holding the lights in place is the light stands consisting of 2 poles and two bases. Moving the lights or adjusting the lights based on the plant growth is easier with these stands. The stand and the lights together are as tall as the garden.
7. Rapid Rooter Grow Medium
The growing medium, mainly comprising of a peatmoss material, is what the seeds need to be placed into to start them off. More can be purchased once you’ve used up all the Rapid Rooter grow plugs provided.
Upon placing the seed into the growing medium, tuck neatly back into the 2-inch net cups and the holders.
8. Maxigro Plant Food
1 kg of hydroponic nutrient solution which is optimized for most leafy and flowering vegetables. If you’ve ever wondered what the numbers stand for on fertilizer it referencing the amount of Nitrogen, Phosphorus, Potassium, always in this order. MaxiGro provides your plants with 10 portions of Nitrogen which helps growth of plants, especially those leafy greens, 5 portions of Phosphorus which aids in root development and 14 portions of Potassium which is crucial for flowers to develop. You can see this from the reference on the package (10-5-14) is provided for the fertilization of plants.
9. Hydroponics pH Control Kit
A small kit with 3 different bottles helps adjust the water’s pH levels. It’s important to closely monitor the PH levels of your water to ensure it remains balanced at around 6.5 using well water which is typically “hard” water will be too alkaline for your plants while using distilled water is typically to acidic. Having water in your tank at both of these levels will prevent your plants from absorbing the nutrients they need to grow big and healthy.
10. TDS Tester
A TDS Tester measures the “total dissolved solvents” in your water. This handy, dependable tester will let you know if your in need from a tank change or perhaps have added to much plant food which has not yet been absorbed.
11. pH Level Tester
By placing the pH level tester’s tip into the water of the system and swirling it around, the pH levels of the water are displayed. You can then use this reading adjust the PH as needed with the provided kit.
12. Mechanical Light Timer
With the built-in timer, you can see which part of the day the LED lights come on. This ensures your plants get the optimal amount of sunlight every day.
13. Mechanical Water Timer
The water timer applies to the pump system and lets you set the time limit for the hours that water is distributed to your plants.
14. Starter Pack of Seeds
The iHarvest garden system has a pack of starter seeds, including lettuce and herbs. Apart from these, you could also use seeds of your choice. Just be sure that you are choosing dwarf varieties of vegetables when growing tomatoes, some indeterminant heirloom varieties can get a bit out of hand!
iHarvest Setup
A TDS Tester measures the “total dissolved solvents” in your water. This handy, dependable tester will let you know if your in need from a tank change or perhaps have added to much plant food which has not yet been absorbed.
1. Preparation
For your iHarvest set up, the unit must be placed indoors against a wall, on a level surface.
If not placed on a proper level, some plants may not get the required nutrients, while leaks could also occur. Since it requires only 2.5 square feet of space, it can be kept in the kitchen or even the living room. This should be an obvious point but worth mentioning incase you have some slanted floors.
Ensure it is placed next to an outlet.
Place the funnel section above the reservoir. 2 mesh pieces must be placed on top of this funnel section and screwed in place. There is a small hole on the right side of the funnel section through which you must pull the tubing.
2. Prep the pump
After placing the 16mm coupling nozzle on the pump, a red rubber gasket must be used to connect the 2 pieces.
Ensure the nozzle is screwed in for a tight fit. Place its tip on the clear pump for a snug fit. (TIP: You could use a drizzle of olive oil on each part for an easy connection of these pieces.)
Place the pump at the center of the reservoir (at the bottom). With the suction cups facing down, press it hard to make it stick well.
A small dial along the pump’s side can be used to adjust the power of the pump. Pass the pump’s electrical cord through a hole in the back of the reservoir.
Each section of the garden wall has holes through which you must feed the plastic hose. Also, there are instructions to create a mesh barrier between the funnel and floor.
The hose must be run to the top of the system, following which the T-pipe must be screwed in at the top. The water drips down onto your plants from this.
3. Trellis Placement
A trellis piece must be placed into the funnel section, and a 6-pot unit must be placed above the funnel section. Snap the plastic trellis in place for each section of the garden wall. An arrow on the trellis bracket shows the direction the bracket must face.
Starting from the base, stack the trellis pieces and 6-pot units alternatively, one at a time. With each stack, you must also pull the tubing up to avoid it being at the bottom after you’re done stacking the units.
4. Set Timers
To ensure your plants get the optimal amounts of water and sunlight every day, you must set the timers by following the instructions.
Plants require 14 hours of light daily; anything more than that could be harmful. 2 outlets on the light timer can be connected to the LED lights. If your looking to save money on the operating cost of having lights on set your timer to match the “off-peak hours” which is when energy costs are the cheapest. In my case running my machine during off-peak hours (after 7pm) cuts cost by about half! Most cities will publish this information for you to easily check when energy use will be cheaper or more expensive. Generally speaking though it’s typically during the evenings.
5. Set Your Lamp Stand
There are metal poles meant to hold the lamps. A hole in the center of each lamp’s base must be screwed into the metal rod. An Allen wrench has also been provided in the iHarvest set to tighten the screw and make the stand secure.
Snap on brackets at the top and bottom of the lights. The lights can be snapped onto the pole with the other end of the brackets. No screws are needed for this as they snap right on.
The power cord of the full spectrum LED lights must be connected to the light timer.
6. Place Net Cups and Fill Reservoir
Place the net cups into the pod holes. Fill water into the reservoir and set the timer. Ensure you hear water traveling to the unit’s top portion and trickling down from the different sections.
7. Add Growing Mediums, Seeds, and Nutrients
Place the desired seeds within the growing medium and keep them in the pod holes. The recommended liquid nutrients must also be added. Instructions on the ‘how and when’ of adding more nutrients and testing the pH levels of the water are provided.
8. Prune
An excellent way to ensure the healthy growth of plants is by pruning them regularly. Plants, like tomatoes and pepper, benefit when pruned correctly. Plants have more air, water, nutrients, and light with pruning.
Even generally, plants in outdoor gardens need regular pruning for good, healthy growth. Some plants more than others benefit from regular pruning, for example dill is an herb that needs to be pruned so that it does not start to flower.
9. Harvest
Some plants are most likely ready for the first harvest after about 4-6 weeks of growing. With a sterilized pruning tool like scissors or garden shears, remove the greens, ensuring only 1/3 or less of the plant’s stems/leaves are removed; any more could damage or even kill your plant.
Typically, leafy greens and herbs will be ready to harvest sooner than tomatoes and peppers.
What Can You Grow in An iHarvest?
From bell peppers and tomatoes to herbs and leafy greens or even watermelon, strawberries, or flowers, your iHarvest garden unit can help grow a wide range of plants, fruits, flowers, and vegetables.
At a time, up to 30 different varieties can be grown in the unit. The benefits of a simple hydroponic system in iHarvest lets you grow a wide range of plants, except root vegetables like potatoes or carrots.
The best part about growing plants like these in the iHarvest system is that there’s no need to use harmful pesticides or herbicides. Since you’ll be growing your food, you could grow completely GMO-free food.
iHarvest Review
A TDS Tester measures the “total dissolved solvents” in your water. This handy, dependable tester will let you know if your in need from a tank change or perhaps have added to much plant food which has not yet been absorbed.
Pros
Aesthetically Pleasing
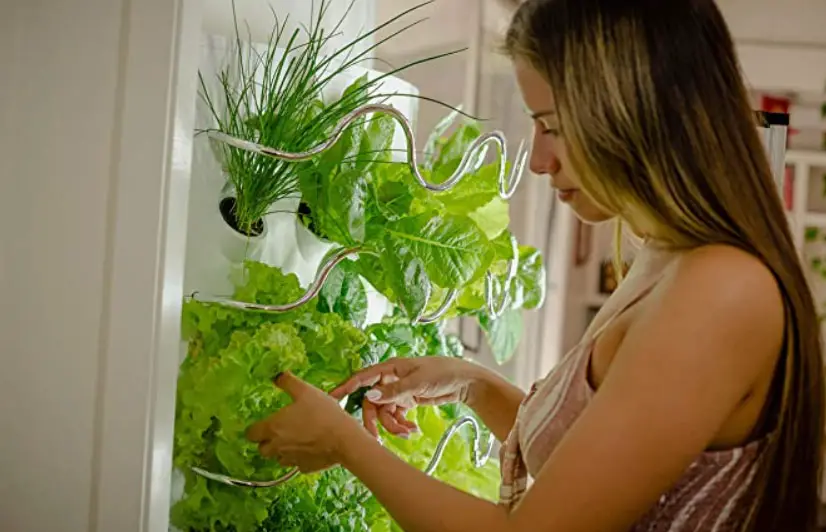
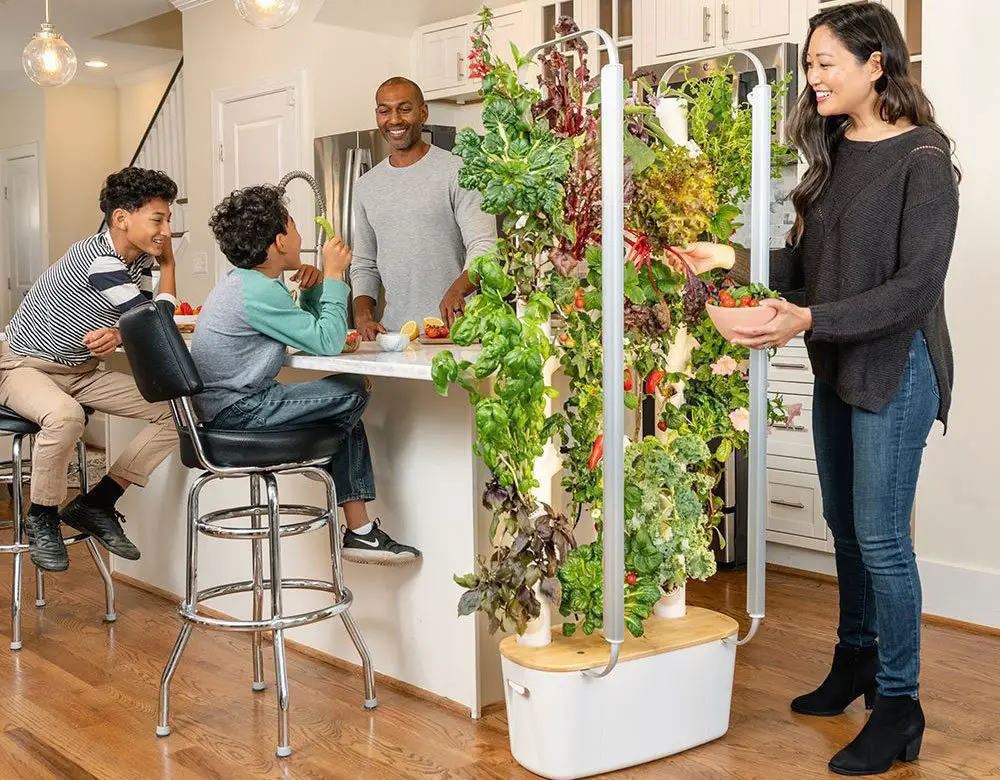
With a sleek unit, the simple yet elegant design makes for good home decor, almost looking like an art installation.
It has been designed to look beautiful in any space, including your living room, kitchen, or any other room, to capture any visitor’s eye (Ours looks great in the Kitchen!). Since there are no exposed pipes or tubes in the iHarvest unit, it has a clean and appealing appearance.
The LED lights illuminate and highlight the lush green garden, and a clean white backdrop with a modern design frame makes it appear like a work of art.
In addition to being elegantly engineered, it has minimal maintenance requirements and is space-efficient. While it typically takes about 13 square feet of space to grow 30 similar-sized plants, the iHarvest system does it in just 2.5 square feet.
Reduced Water and Nutrient Usage
Compared to traditional gardening methods, the iHarvest uses about 90-98% less water. To me, that is the true meaning of an economical gardening technique.
Not only does this significantly cut down your water bill, but it also helps when living in drought prone areas where water consumption can be a real concern. Since there’s no soil used in the system, only a fraction of water and nutrients are used compared to a typical garden, leading to no waste.
Year-Round Gardening
The iHarvest hydroponic system provides you with plentiful harvest all year.
Regardless of the season, you’ll be able to grow plants even in the dead of winter. Some plants even fully mature in 4-5 weeks.
Since your plants will be growing right at home, you can harvest them when needed.
The nutritional value and freshness of the food remain intact. Instead of store-bought produce, your freshly harvested produce will be dense with vitamins, minerals, and other micronutrients.
You could even cut down your visits to the farmers’ market or the supermarket.
Impressive Yields

With the capacity to grow 30 plants at a time while growing 365 days a year, that’s almost $1000 worth of vegetable yield you will be able to grow in a year. This translates into a cost of less than $0.50 to grow a large serving of vegetables or fruits.
This is attributed to the capacity of producing 30%-50% bigger and 3x faster than traditional gardens. With the plants getting the perfect amount of nutrients and water, less time and energy are spent developing the root systems.
Hence, the leaves and fruits grow quicker and larger.
Since there is no soil required to grow plants in this system, the chances of plant diseases or fungal infections are reduced. Growing your own plants means there is no need to use herbicides, pesticides meaning technically anything you grow will be organic.
While it takes about 28 days for tomato plants to grow to a large size with traditional gardening, in the iHarvest system, it takes only 15 days.
Beneficial Lights
The iHarvest comes equipped with a full spectrum of LED lighting which is crucial to your plants growing properly. Not having the right light spectrum could sabotage your growing without you knowing it.
The total energy consumption of both the LED lights is 72W, equivalent to the energy of a traditional lightbulb. They’re also 8x brighter than typical lights.
Cleaner indoor air
Having more plants in your home help purify the air by naturally replacing carbon dioxide with oxygen. Their presence indoors also helps reduce anxiety and boost the overall mood.
Additionally, indoor plants have been shown to lower blood pressure and reduce the risk of illness. Houseplants supposedly improve concentration and also help boost productivity.
Overall, you have a healthier and more vibrant space.
Fully Automated
With built-in timers, you don’t have to worry about watering your plants or turning the lights on or off. The timers for the light and water ensure the optimal amount of sunlight and water for your plants every day.
You merely need to plug it in and fill water and nutrients into the reservoir every couple of weeks.
Cons
Bright Lights
Since the LED lights serve as an alternative to sunlight, these could get incredibly bright.
It could cause headaches or stress on your eyes if you’re sensitive to bright lights. If so, it would be better to place the unit in the basement or a spare room.
While the lights and stand together are almost as tall as the unit, the lights themselves are just about half the size of the entire unit. This becomes an issue when the plants grow to a point where the lights don’t reach.
My Final Thoughts
The iHarvest comes equipped with a full spectrum of LED lighting which is crucial to your plants growing properly. Not having the right light spectrum could sabotage your growing without you knowing it.
The total energy consumption of both the LED lights is 72W, equivalent to the energy of a traditional lightbulb. They’re also 8x brighter than typical lights.
Expensive
For a system that has a simple design, I would say $849 is a bit on expensive side.
Even the components appear to have been purchased by IGWorks from different suppliers of the hydroponic industry (such as the growing medium, nutrients, etc.)
That being said, having a system that can grow nearly $1000 worth of fresh produce every year makes it a good investment in your gardening plans if eating more vegetables is one of your goals. For me it has been worthwhile not having to worry about buying wilted greens in the winter months when the grocery selection is sparce.
Several Different Parts
The pieces included in the iHarvest system seem to have been purchased from hydroponic wholesalers, including the timers, the pump, and the pH kit. Rather than being iHarvest branded, your entire indoor garden is a mixup of multiple brands by the looks of it.
This is not necessarily bad, though, since finding replacement parts will be easy and often interchangeable with other market parts of similar nature. I would have liked some consistency here though given the price point.
iHarvest Vs. Gardyn
While Gardyn and iHarvest are very similar, there is a considerable difference in how they’re designed.
The iHarvest unit has slightly bigger dimensions and weighs slightly more than the Garden Home Kit 2.0 by Gardyn. The LED lights of iHarvest also use more watts, hence more power.
Both of these systems are priced almost the same; however, Gardyn has a sleeker design, and the functions can be controlled with a smartphone app. However, the app is not well designed and can seem a bit buggy at times. This takes away from the overall elegant feeling that Gardyn in looking to convey. Here are the general specs in how they compare to eachother.
|
iHarvest |
Gardyn | |
|
Weight |
22 lbs. |
20 lbs. |
|
Dimensions |
32” x 14” x 60” |
24” x 12” x 64” |
|
Light System |
2 x 36W LED Lights |
2 x 30W LED Lights |
|
Trellis Fittings |
Yes |
No |
|
Floor Space |
2.5 square feet |
2 square feet |
|
Reservoir Capacity |
17 gallons |
5+ gallons |
|
Smartphone Control |
No |
Yes |
|
Vacation Mode |
No |
Yes |
|
Price |
$849 |
$999 |
|
Number of Plants (Capacity) |
30 |
30 |
|
Return Policy |
30-day |
60-day |
|
Membership |
Yes |
Yes |

iHarvest Vs. AeroGarden Farm
If you have read any of my previous posts on indoor garden systems then you know by now that the AeroGarden in one of my favorites. The AeroGarden Farm24 has a slightly lower capacity to grow plants simultaneously than iHarvest.
The main advantage of iHarvest is that you can add more sections to the garden wall, allowing you to grow and harvest more than 30 plants at a time. The limitations would be the water pump’s power and the room’s ceiling height.
The yields that the iHarvest claim to produce yearly is more than any of the AeroGarden Farm models.
In terms of design, the AeroGarden Farm models have fancy displays with movable parts, while iHarvest looks relatively simple.
All the parts of the AeroGarden system are Aerogrow/AeroGarden-branded. Instead, the iHarvest system has parts put together from different hydroponic wholesalers.
Due to this, parts replacement for iHarvest is more accessible, while replacing lights or the LCD screens in the AeroGarden unit can be pretty challenging.
|
iHarvest |
AeroGarden Farm 24 XL | |
|
Weight |
22 lbs. |
58 lbs. |
|
Dimensions |
32” x 14” x 60” |
14” x 36” x 45.5” |
|
Light System |
2 x 36W LED Lights |
2 x 60W LED Lights |
|
Dimmable Lights |
No |
Yes |
|
Floor Space |
2.5 square feet |
2 square feet |
|
Number of plants (capacity) |
30 |
24 |
|
Price |
$849 |
$1049.95 |
|
Smartphone Control |
No |
Yes |
|
Unit Controls |
Dials for timer adjustment |
Touch screen control panel, Wi-Fi and Amazon Alexa connectivity |
|
Trellis Fittings |
Yes |
Offers 36” growth height with a movable trellis system |
|
Return Policy |
30-day |
30-day |
|
Vacation Mode |
No |
Yes |
|
Low Water and Nutrient Reminder |
No |
Yes |
iHarvest Vs. Tower Garden
Similar to iHarvest, the Tower Garden is an aeroponic system that is fully automated and requires no soil to grow plants.
The plant capacity of Tower Garden is slightly more than that of iHarvest, and it can be used both indoors and outdoors.
A minor disadvantage of Tower Garden is that the grow-support cages and LED grow light kit are sold separately, while in iHarvest, the trellis attachments and LED lights are included in the unit.
On the other hand, the tower garden has integrated wheels at the bottom for easy movement around the space.
|
iHarvest |
Tower Garden Home | |
|
Weight |
22 lbs. |
34 lbs |
|
Dimensions |
32” x 14” x 60” |
27” x 27” x 17.4” |
|
Floor Space |
2.5 square feet |
9 square feet |
|
Reservoir Capacity |
17 gallons |
13 gallons |
|
Light System |
2 x 36W LED Lights |
108W LED Lights |
|
Usage |
Indoors |
Indoors and Outdoors |
|
Number of Plants (Capacity) |
30 |
32 |
|
Price |
$849 |
$849 (with LED grow lights) |
|
Automated System |
Yes |
Yes |
iHarvest Vs. Click & Grow
The Click & Grow systems are comparatively more compact than the iHarvest
The Click & Grow 25 is a more efficient system in terms of power consumption. Using just 200kWh of energy per year, it is 10 times more sustainable energy use per plant.
Up to 3 modules of its unit can be stacked on top of each other, providing the benefit of growing 75 plants with the same floor space.
Its unique tray system guarantees a weekly harvest; you could insert plant pods from one end while harvesting from the other.
|
iHarvest |
Click & Grow 25 | |
|
Dimensions |
32” x 14” x 60” |
29” x 16” x 20.6” |
|
Floor Space |
2.5 square feet |
3.2 square feet |
|
Light System |
2 x 36W LED Lights |
2 x 16W LED Lights |
|
Number of Plants (Capacity) |
30 |
25 |
|
Automated System |
Yes |
Yes |
|
Smartphone Control |
No |
Yes |
|
Price |
$849 |
$799.95 |
My Final Thoughts
Considered as one of the leading hydroponic systems available in the market, the iHarvest makes indoor gardening easy, even for beginners.
It makes a great fit even in the smallest of spaces and efficiently helps you grow your own fruits, vegetables, and flowers. Not to forget, the iHarvest garden system is a beautiful addition to your indoor space.
To purchase or not to purchase? I hope I’ve helped you make up your mind about the iHarvest system.