
How to revive an Air plant (Tillandsia): 7 Easy Steps

This post follows our research editorial guidelines.
Air plants ( Tillandsia spp.) are tough plants capable of near miraculous recoveries. So long as you water them from time to time there’s not much you can do to kill them. Even if yours looks dead as a door-nail it’s probably only one good soak and a shake away from springing back from the brink. It’s not much work to bring miserable looking air plants back to life – let’s look at the most effective way to revive air plants together!
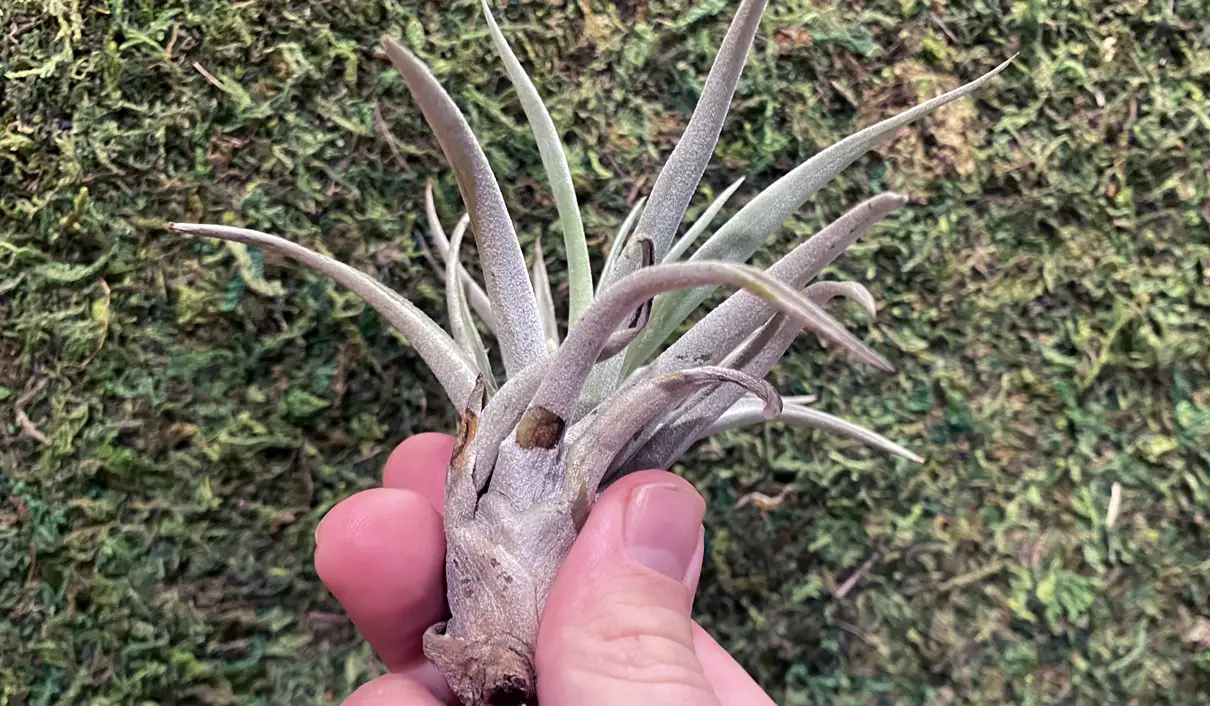
Table of Contents
What Does a Healthy Air Plant Look Like?
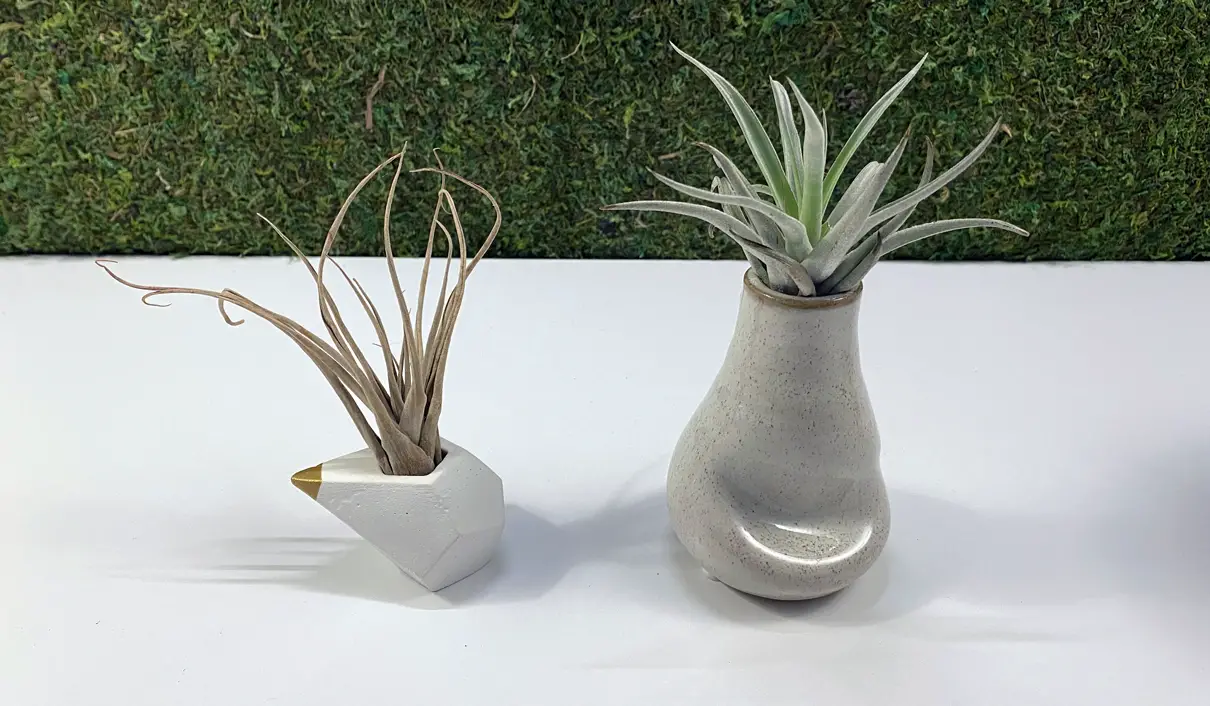
Given that an even a healthy Tillansdia can look a tad on the dead side from time to time, how do you tell the difference between a thriving specimen and a dead air plant?
Healthy Air plants are wiry but not brittle. Their leaves have a leathery quality and are often fuzzy or rough to the touch. The leaves will be even without cracks or puckering, and will be firmly attached to the base of the plant. They sit open and relatively straight with little to no curling at the tip.
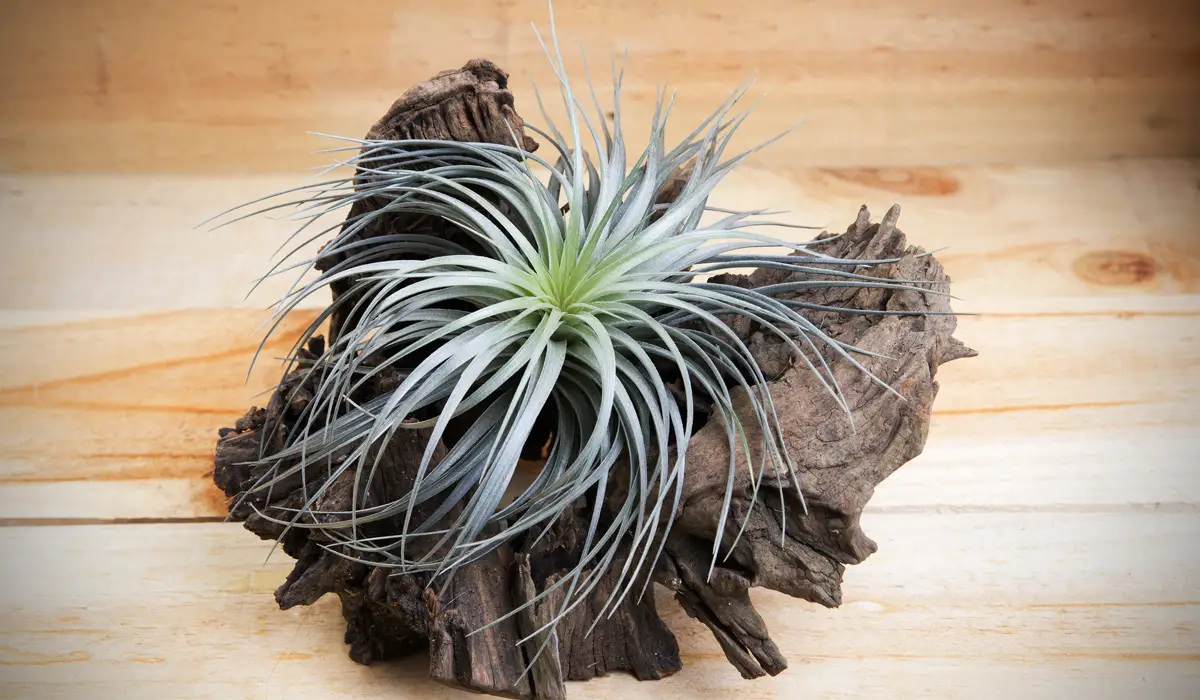
Depending on the species, a thriving Tillandsia will be shades of sage green or silvery gray. Some like the Tillandsia ionantha may even have pink, red or purple tips. That color will be even and bright without blotchiness or speckles.
They won’t have much by way of fragrance, even when flowering. They tend to mostly smell of the room around them.
Signs that an Air Plant is Dying
So how do you spot a dying Tillandsia? The trick is to watch for changes in the condition of your plant, especially the texture and smell.
A Tillandsia killed through neglect will be crisp and crackly to touch. It will turn brown from the leaf tips down and lose its lovely color. Dead leaves tend to develop from the outside in. They become wrinkled or puckered as they dry out, especially the bigger ones like the Tillandsia xerographica. They’ll eventually become dry and papery, and the whole plant will eventually disintegrate. Larger leaves will curl up inwards along the edges too. Finer foliage will turn brown or black and become wiry.
Infected air plants on the other hand will have dead leaves on the inner part of the plant, dark and soft to the touch. Sick Tillandsia often stink of decomposition. Blotchy areas of rot may develop, either in the thicker parts of the leaves or down towards the base. The poor plant falls apart with even the gentlest handling.
Ironically the happiest of all plants, one with a flower, is also a plant that is doomed. A bloom tells us the Tillandsia has come to the end of its lifespan. It will flower and die, leaving a tiny new plant or two behind.
I go into a lot more detail how to spot the signs of a dying air plants here.
Trichomes and Water Turn Brown Leaves Green
Tillandsias used special structures called trichomes to take in water through their leaves instead of their roots. These strange little plants can often have no toots at all. Wild air plants can grow in all kinds of odd places thanks to their ability to draw nutrients and moisture from the air. It’s key to how we resurrect even the most dried out plant and keep it thriving.
Luckily it’s not uncommon for even the experienced Tillandsia air plant grower to mistake ‘dying’ for ‘dead’. Even a truly dried out looking air plant fully revives with the right attention. I know I’ve been astonished at the results of a good deep watering, bright and some good air.
“In nature, Tillandsia species are epiphytes, meaning they attach to other plants or rocky substrates as a means of support. They are unique because they get all their water and nutrients from the air through special scale-like structures on their leaves, which trap moisture and dust, providing the plant with water and nutrients. “
Master Gardener Sandy Vanno, Cornell University Extension Service
How to Revive an Air Plant
Step 1
First work out what’s killing your poor air plant. Check it for rot or signs of pests. Is it just dried out? Maybe it’s been in a dark room or neglected for too long. Like most bromeliads they’re also copper sensitive, so if you’ve put yours in a pretty copper pan or wired it upright with bright copper wire it may be poisoned. Tillandsias
Step 2
Next remove dead leaves. Any that are black, brown or starting to fall apart should be removed with clean scissors or garden shears. Inspect the base of the plant to check for soft patches or signs of rot. Any soggy leaves must be cut away – and if you cut them all off it’s an indicator your poor Tillandsia is truly and undeniably dead and not worth trying to revive.
Step 3
Water your air plant. The best way to water air plants that are circling the drain is to soak them root to tip.
To do this, fill a bowl or dish with clean water. Tap water often has chemicals in it like chlorine or fluoride that can cause damage, so filtered or distilled water is best.
Once the water reaches room temperature dunk the whole plant in. Swish it around to clear any bubbles of air trapped against the leaves. I like to use a plate or small rock to keep it submerged while the plant is receiving this spa treatment.
Keep the air plant underwater and the plant starts absorbing moisture immediately. You might notice that your air plant turning green only seconds after you put it in water. Since air plants take water up directly through the leaf they’re able to revive with astonishing speed.
Don’t be dismayed if the entire plant continues to look like a kitchen scourer or a lump of dried string. Submerge the plant and wait. For a Tillandsia that’s really dried out soak the plant overnight. This will give your air plant lots of time to rehydrate.
Step 4
Remove the air plant from the water and allow it to dry completely. Upside down is best to ensure any excess water drains away. Too much water trapped in the leafy base of the plant can cause rot. A good trick is to hold the plant by the bottom and give it a firm flick to make sure it’s truly drained then allow to air dry.
Step 5
If you’ve done any heavy pruning it’s a good idea to apply a bit of cinnamon to any cuts. Each brown leaf you chop off leaves a scar of exposed tissue behind. Powdered cinnamon is an effective antifungal and antibacterial agent. Dust a little over the cut area and it’ll stop the wounds becoming infected.
Step 6
Assess your Tillandsia’s growing environment before putting it back. If you keep your air plant in the wrong spot no attempt to keep the plant alive will succeed. You’ll need to make sure whatever is causing the plant to suffer has been corrected. Sometimes that’s when we forget to provide the plants with water, but other times there’s an environmental problem that causes the air plants to die.
Air plants prefer bright but indirect light. Good air circulation is also key to keeping those green leaves crisp and fresh. Finally watch out for copper wire, planters or dishes. Tillandsias are sensitive to copper and the plant begins to suffer the second they come into contact with it.
Once you’re confident that the spot you’ve picked will be good for your Tillandsia you can place your air plant in its home.
Step 7
Wait a week and check how your plant is looking. If the plant still looks grim pop your air plant in the water for another swim. Sometimes it takes a few trips to the spa to really revive a sick air plant. I know the feeling!
After the first big soak you can remove the plant from its bowl of water after a half hour. Be sure to air dry after before you put the plant back. You really want to keep air plants dry between watering. Because they draw water through their leaves rather than roots you can wind up with root rot like problems if you place it back in its spot before it’s totally dry.
Why is my air plant dying?
Before you go beating yourself up make sure it is actually dying. Air Plants are tough customers. In the wild they can cover trees, on power lines and in some places are actually considered pests. Even if they look like they’re struggling there’s a good chance your failing indoor air plant might just need a good drink and a change of scenery to spring back.
But if you are seeing substantial signs of problems consider your growing environment. They need the same conditions as any plant – fresh water, light and clean air. A lot of tender care with no change to an ailing Tilandsia can indicate that your plant needs a change of scenery.
The average air plant needs lots of bright but indirect light to thrive. They also need decent air flow to keep their trichomes in good working order. Poor air circulation allows the pores of their leaves to become clogged, especially indoors where the type of dust is difficult for the Tillandsia to deal with.
How do I care for my Air plant?
It doesn’t take much to revive a dying air plant. It also doesn’t take much to keep them thriving. Air plant care is simple once you understand how these plants grow. These special plants don’t need much. They don’t even need a pot! So long as you water your air plant at least twice a month and make sure the plants can get enough light they’ll thrive.
Before you go!
6 Tips to Harvest Mint (And What to Avoid)
Ultimate Air Plant Care Guide: How to Grow Tillandsias
Are Air Plants Toxic to Cats?
Air Plant Pups: How to Propagate the Flowering Tillandsia