
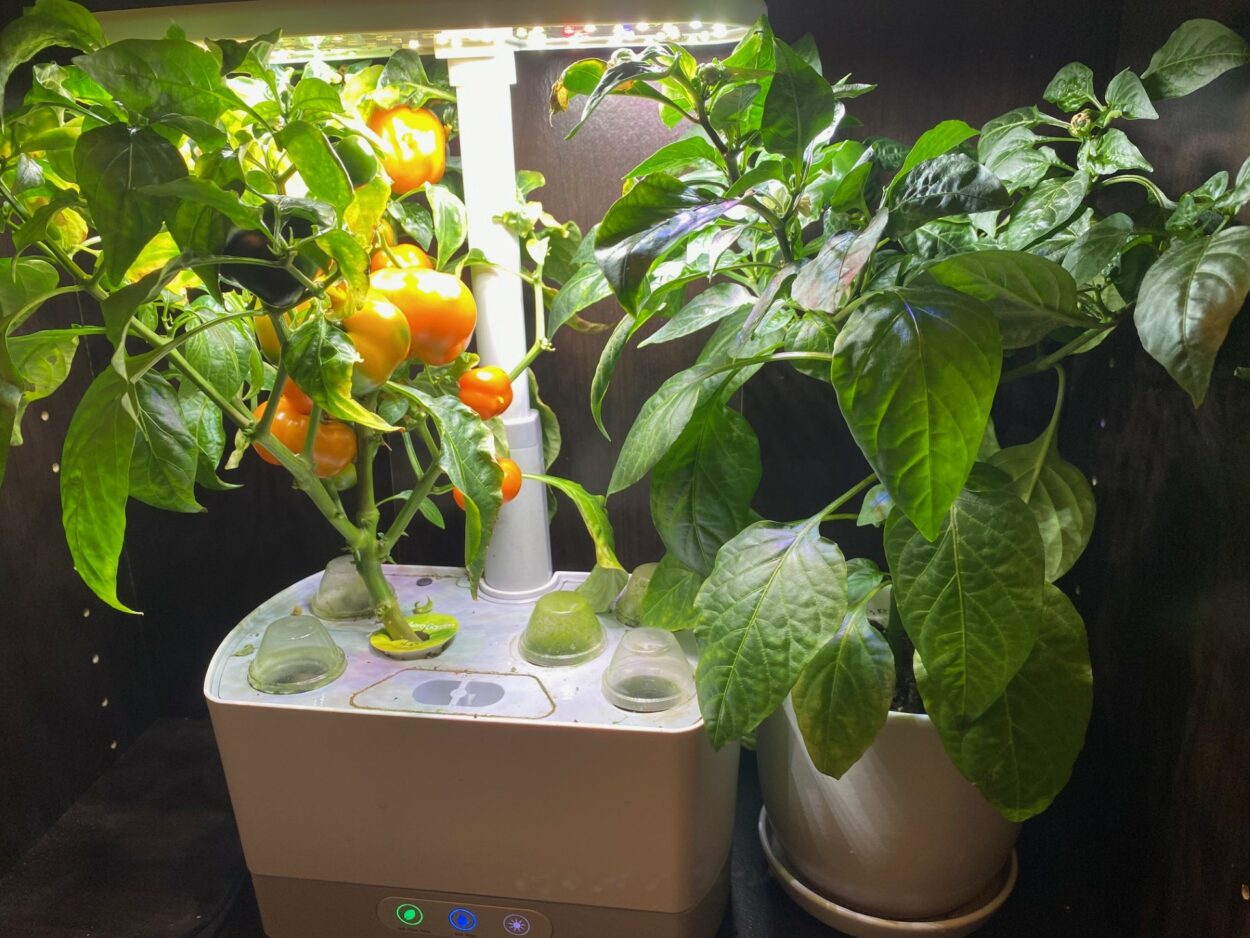
How To Grow AeroGarden Peppers

This post follows our research editorial guidelines.
One of my all-time favorite vegetables (or fruits for you fanatics out there) is the pepper. With so many different pepper varieties and flavor profiles from sweet to spicy it really is a versatile vegetable.
Since I’m located in southern Ontario where the summer months don’t last long. This always creates a bit of a battle in my garden for what seeds to grow next.
Do I risk the season by growing a rare heirloom pepper that takes 120 days to produce or do I play it safe with something more reliable? If you’re like me and don’t have year-round days above freezing then naturally you may be wondering; Can I grow peppers in my AeroGarden? The short answer is YES you can! With a little bit more of time and dedication, you can grow AeroGarden peppers all year round.
This Guide Covers:
How to grow AeroGarden Peppers
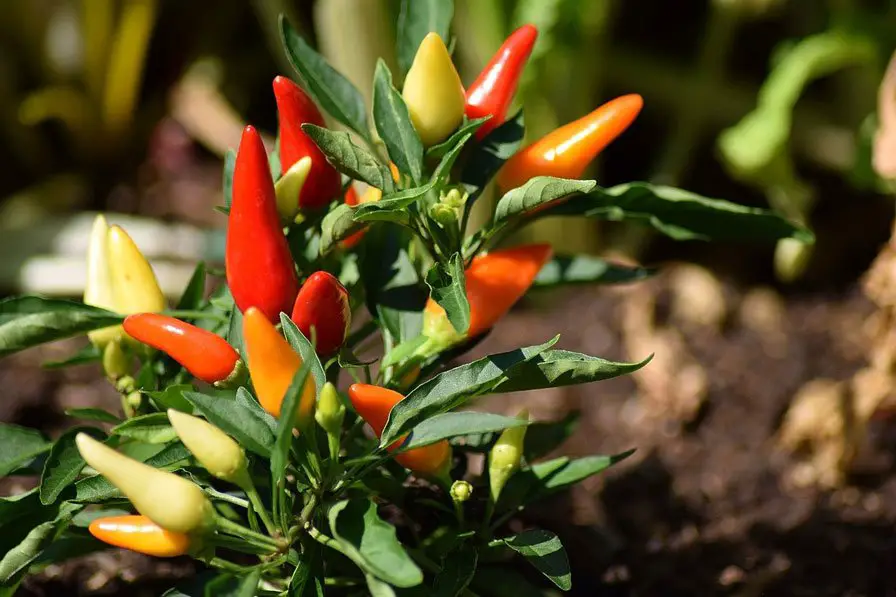
Growing peppers in your AeroGarden will really depend on the variety you would like to try. The seed options that are available to grow from AeroGarden are Non-GMO and cultivated by Miracle Grow. These seeds range from red Thai peppers, jalapeno peppers and of course the sweet bell pepper. While it’s great to have some of these staple peppers readily available I often flock to the lesser-known heirloom peppers like purple super hots , when grown right it has a mild cotton candy flavor… so delicious!
To grow an uncommon pepper like this you will need to use your own seeds in a “grow your own” seed pod kit. Another great option is to simply re-use your old grow baskets. While it’s not recommended to re-use old grow sponges due to bacteria contamination it is possible to re-use the plastic grow baskets after a good cleaning. This will help you to save a few extra dollars each grow.
Finally, if you are really feeling crafty creating your own seed pods may be the best option for you. Seeds are not too finicky with the place they sprout in but hygiene is very important.
As long as your seed pod is clean and uses a fresh grow sponge or grow medium then your seed will sprout happily.
In the past I’ve found green strawberry baskets to work extraordinarily well when creating new seed pods from scratch. The gaps in the netting are the perfect distance apart to keep a wide variety of growing medium from sponge’s clay pebbles contained.
Step 1: Prepare your seed pod kit
Now that you have a few options to choose from you can begin to prepare your seed pod. If you choose to use the seed pod kits provided by AeroGarden then there is not much work you need to do. Simply place you pepper pods in an open space and let the growing begin!
If, however you are planting your own variety of pepper then place 2 seeds in your sanitized grow sponge. If both seeds sprout keep the largest one with the biggest leaves and cut away the other. Remember to label your seed pods if you are growing more than one type of pepper plant.
Step 2: Finish set up and installation
Now that your seed pods are ready it’s time to find a home for them. Peppers enjoy growing close together (unlike tomatoes) but will still require considerable space. Leave a space in-between pod slots of each pepper plant.
You can fill these gaps with smaller herbs like basil, thyme or oregano to make good use of the space. Once your plant positions are determined fill up your AeroGarden with clean water. Depending on where you live you may need to use filtered water in your system.
Refer to this water hardness guide to determine if this is needed. Most municipal tap water will work perfectly but if you get your water from a well or you live in an arid climate like California it’s worth double checking with your city or purchasing an inexpensive PH tester.
Anything above a PH of 6 will work well. Add the recommended plant food to your water reservoir and remember that young seedlings love humidity so make sure you attach the domes for optimal germination.
Step 3: Prune your pepper plants regularly
Once you pepper plants reach the height of 6 inches or so it’s a good time to begin pruning regularly. Start by cutting off any of the larger leaves that may not be fully under the light with a clean pair of garden shears or scissors.
This is especially important if you are using a smaller model like the AeroGarden Bounty. While it may seem counterintuitive to damage your pepper plants, pruning your will create a bit of healthy stress which tells the plant to focus more production effort on growing flowers and fruit rather than lucious leaves.
As a general rule I follow the 20/20 principal and only ever cut away no more than 20% of the leaves and then again after I see 20% growth (roughly) come back.
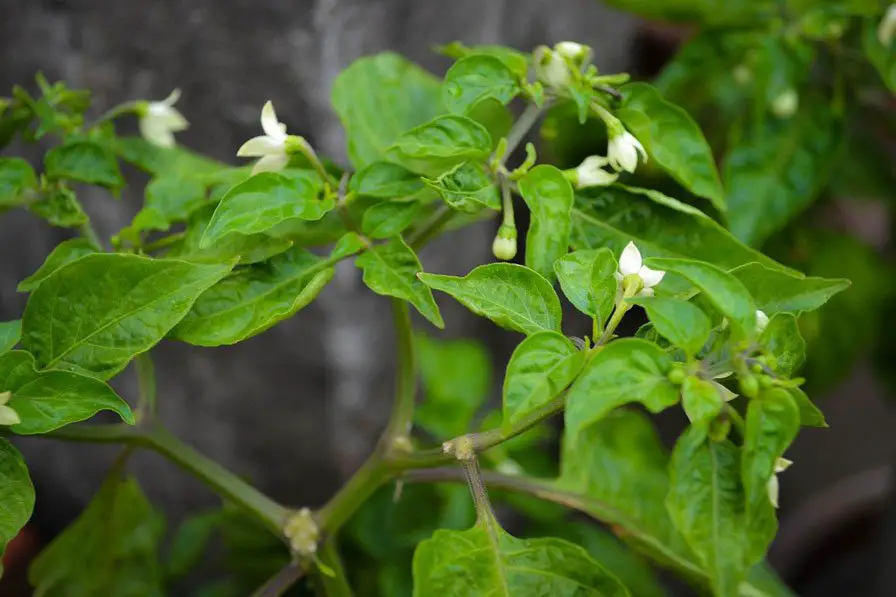
Step 4: Pepper pollination
As with most fruiting vegetables they all start off as a flower that will need to be pollinated. Some require a cross of male and female flowers like cucumbers while others like peppers and tomatoes are self-pollinators. For self-pollinating plants, you have 3 main methods:
Method A: The shake down
For this method it’s as simple as it sounds. Simply tap the branches that lead to pepper flowers. Be sure to hit the plant to hard, just enough to see flowers begin to shake. This will loosen the pollen from the pistils for the peppers to form.
Method B: The pollinator
This is a bit more of a high tec solution that involves using a vibrating bee wand created by AeroGarden to gently tap the flowers directly. This method will offer the best results since it so closely mimics nature. Essentially you are simulating a bee landing on each flower to collect the pollen. Exactly what the plant needs to produce peppers!
Method C: Set up a light fan
Another great way you can simulate nature is through a simple house fan. Like I mentioned earlier pepper plants do not need cross-pollination in order to produce fruit.
This means that a flower can pollinate itself by a gust of wind, or in this case the breeze from a small fan. Simply set up the fan to be about 2 feet away from the AeroGarden and set the speed to low. You don’t want the branches to blow the over or move much at all, instead look movement from the leaves. Leaving the fan on for a few days is enough to ensure proper pollination.
FAQ
How Long Do AeroGarden Peppers Last?
Peppers tend to have a longer growth cycle than most other commonly grown vegetables. This is due to the environment they are used to thriving in -Warm climates close to the equator. For the pepper plant there was no need to worry about cold snaps in October so you can expect to see these plants live for 7-8 months during one cycle in your AeroGarden.
In-fact some growers treat hot habanero plants like bonsais, keeping the same plant growing for years. In these cases, the plant will go through a dormancy stage in-between production cycles and begin to form a tree trunk like lower stem. While it may be fun to try, one growth may be enough in your AeroGarden before you try your luck at growing again.
How Long Until The First Harvest Of AeroGarden Peppers?
Sweet bell peppers tend to ripen faster than their spicy counterpart. Much of the ripening time will depend on the variety of pepper you choose to grow. If you plan on growing a strain that is offered by Miracle grow in the AeroGarden system then you can expect a shorter ripening stage 60-70 days. However, if you choose to grow your own store-bought peppers then this time could increase to 90 or even 120 days for some heirloom hot peppers.
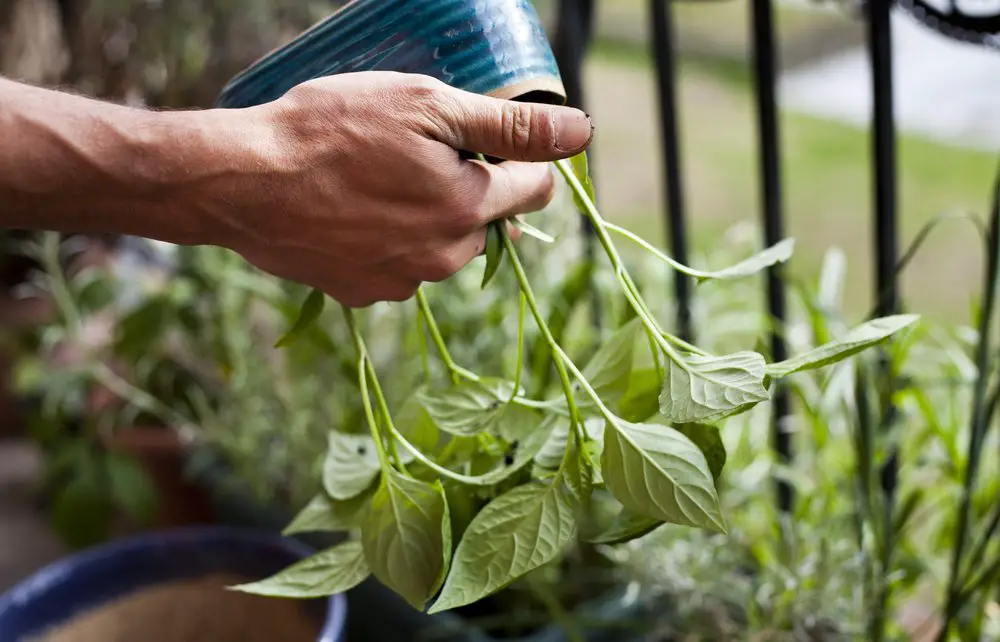
How To Transplant Peppers From Your AeroGarden?
Similar to tomatoes, Pepper plants have a robust root development system in place that allows them to easy sprout new roots from cuttings. If you would like to get the most out of your already well-established pepper plant then you can cut off a branch to easily create a new pepper plant. Simply follow these steps below:
Step 1: Ensure good timing
Cuttings from pepper plants should only be taken during certain growth times of the plant. This should take place once the pepper plant has had enough time in the vegetative stage to grow at least 5 off-shoots from the main stem. There should also be no flowers present since the transition from fruiting would have already begin.
IMPORTANT
If you take a cutting from a pepper plant that has already begun to produce flowers or fruit then you will end up with a severely stunted clone of the original plant. The cutting will not produce any quality fruit and will not grow much past the original cutting size.
Step 2: Place the cutting in water
Now that you have a cutting that has 2-4 leaves on it, place it in a cup of water by a sunny windowsill. If you have a empty spot in your AeroGarden you can also place the cutting in a grow sponge pod.
If you choose to keep the cutting in a cup of water make sure that only 2 inches of water is being used and that none of the leaves are under water. Where the stem touches the water is where you will expect to see new roots develop.
Step 3: Transplant the pepper
Once a healthy web of roots have developed you can go ahead and transplant the pepper. Find a good spot for the pepper plant to grow outside that will receive full sun. Dig out a hole the width of the canopy of leaves and the depth of the root system.
To avoid transplant shock bring the cutting out in the sun for 4 hour intervals and repeat this until you no longer see drooping leaves. Once you are confident that the new plant can handle the full sun it is about to receive, go ahead and place the pepper plant in the soil and cover up any exposed roots.
Step 4: Water regularly
The first few weeks of any new transplant is the make-or-break time. Be sure to water your new pepper transplants every day the first week and every time the soil begins to dry out after the first week. Watering your plants in the evening or early morning will ensure deep hydration since the full sun can often evaporate the water before it has enough time to properly soak in.
Choosing the right Hot Chili pepper to grow.
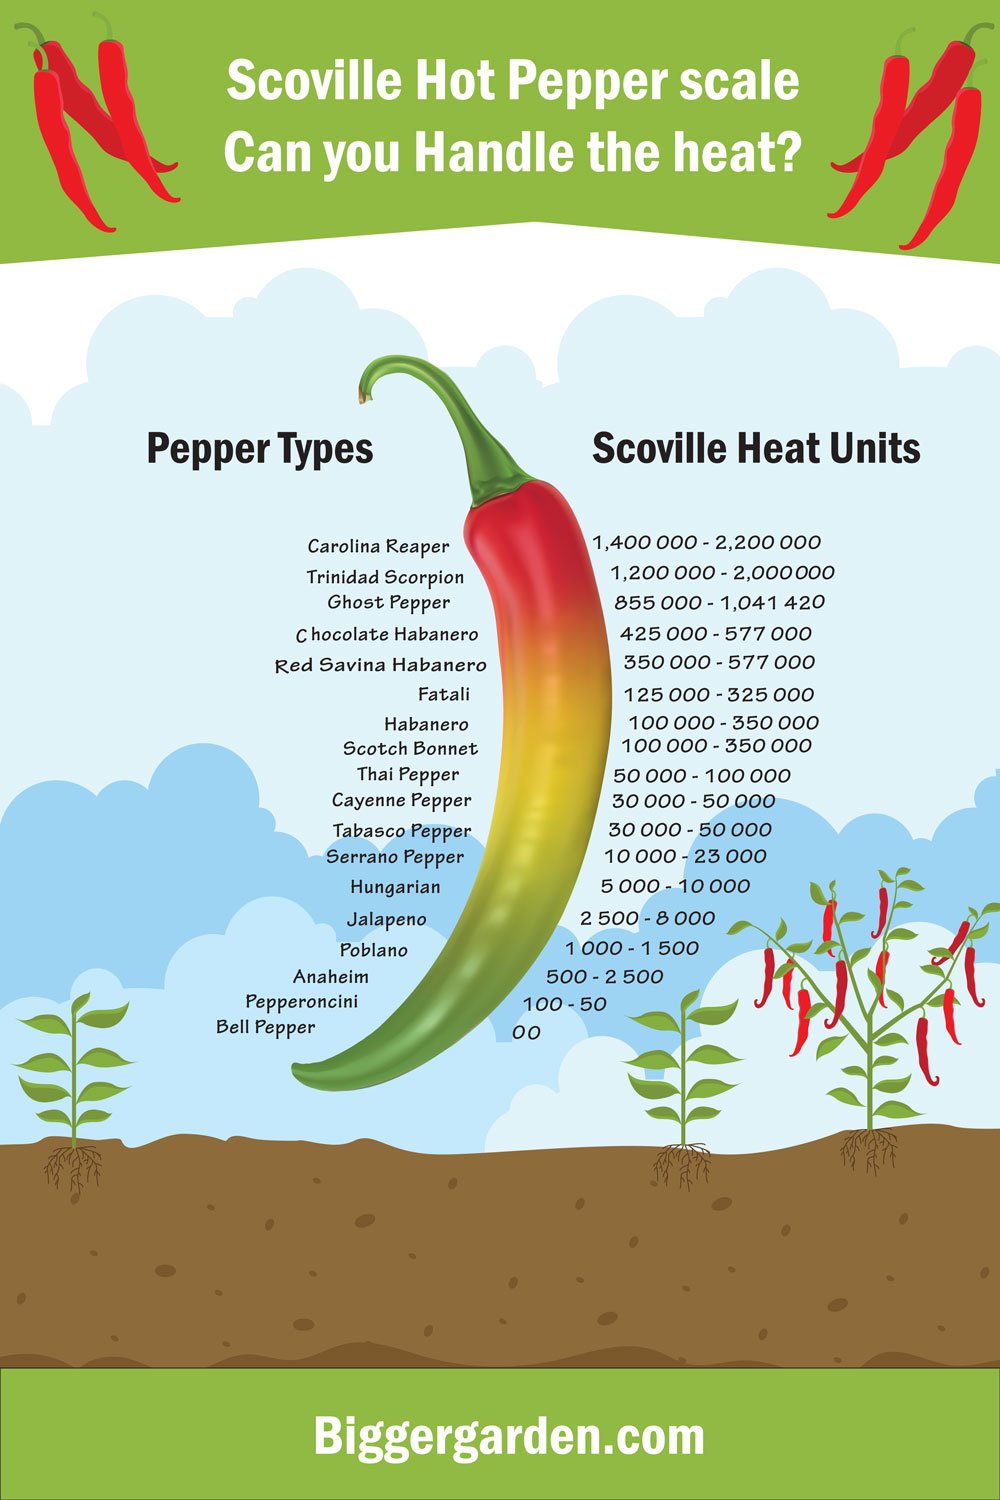
You may want fire and brimstone when looking for a hot pepper to grow or simply something with a bit of kick. Since this scale hotness fluctuates so greatly between to hot to handle and just right we have included a helpful pepper guide to gauge the heat you can expect to endure. This scale is known as Scoville Heat Unit Scale and covers everything from unbearable Carolina Reaper all the way down to the mild jalapeno pepper.
Scoville Heat Unit Scale
This guide will help you to choose which pepper variety to grow based on your tolerance to heat. The scale starts with the bell pepper which has 0 heat all the way up to the Carolina Reaper which can register at 2.2 million Scoville units. That’s a whopping 275 times hotter than the hottest Jalapeno pepper.
Final thoughts
Thanks for following along with our AeroGarden pepper growing guide. If you have any questions that we did not answer or some hot pepper horror stories feel free to share them in the comment section below. Happy harvesting!
Before you go!
The Secret to Growing Hydroponic Basil at Home
Clean and Sanitize your AeroGarden for Hydroponic growing
A Complete Guide to Your Hydroponic Ebb and Flow System: Hydroponics for Beginners
Gardyn Vs. AeroGarden